Kind of rough, maybe ver 0.8, who knows. Better than a poke in the eye with a short stick.
Covers everything from Pod connections, to installing Toolchain, oopsy, etc. and introduces the oopsy pod_template, with some example simple mods to the patch. Written for the absolute beginner to Daisy.
Enjoy
Criticisms and suggestions are welcome, but please be civil
EDIT 4/1/23 @Takumi_Ogata could you look over my guide. Not sure what the Pod’s usb connector is for. Had assumed it was for the Pod’s headphone amp and line out. @tele_player corrected me that the Daisy Seed provides power. What is the other usb connector for as it appears from the pod schematic that it is used for otg?
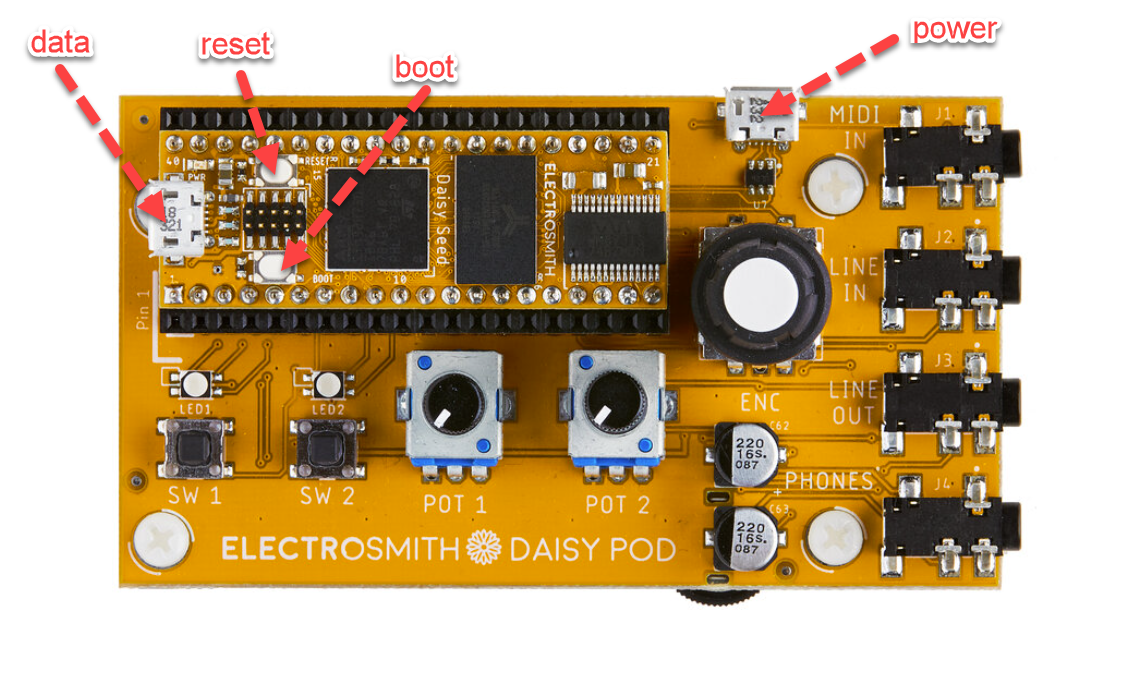
In the Guide I emphasize that the data cable (usb cable must be capable of passing data) is for the top mounted seed and where the flashed programs go, from pd or max, etc.
The Pod carrier board gets a usb power cable to support the electronics like the headphone amp that is on this carrier board. There is a kind of garbled Daisy Pod schematic floating around, but it appears to be a blueprint and not really conducive to understanding how the Pod/Seed are wired, IMHO.
Just for kicks last night I installed Affinity Publisher to see what the Guide would look like in a properly formatted desktop publishing document. At this point it doesn’t look it is worth the effort of learning AP, so I will stick for now with Atlantis word processor. Atlantis is a cool project competing with the major s/w players, and you should support them if you can. Only drawback to my purposes is that it can’t save as a pdf.
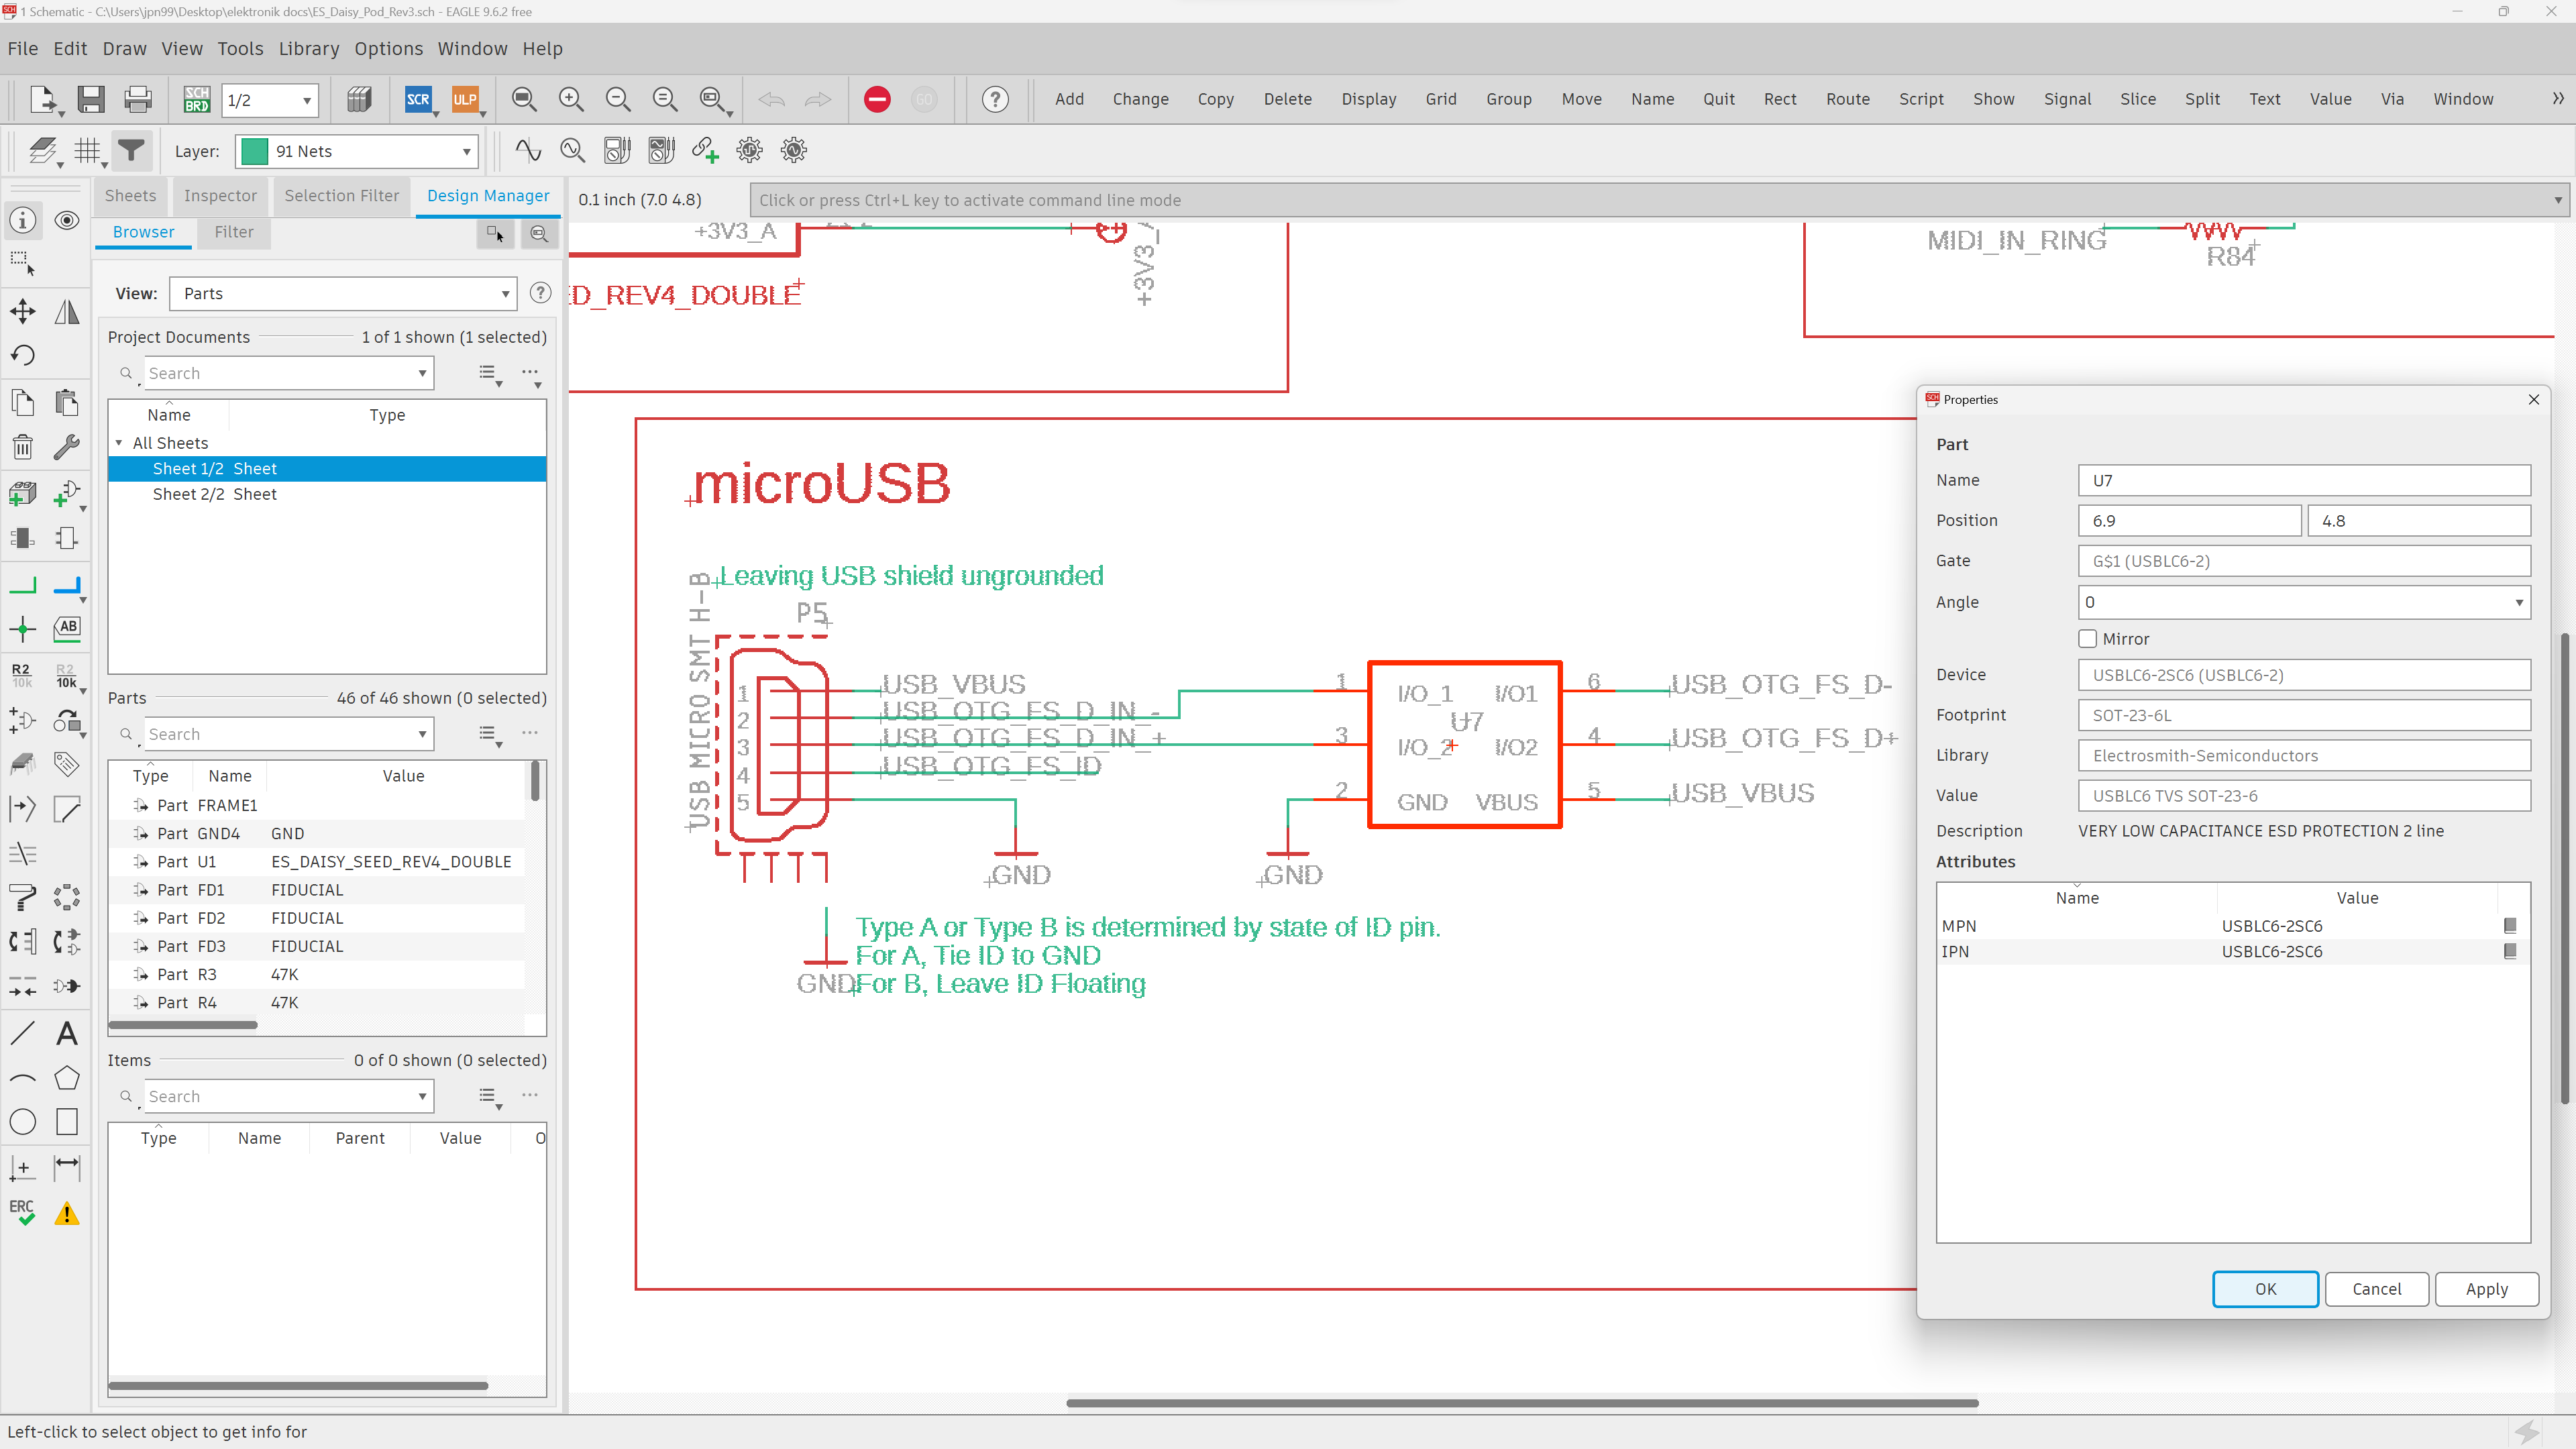
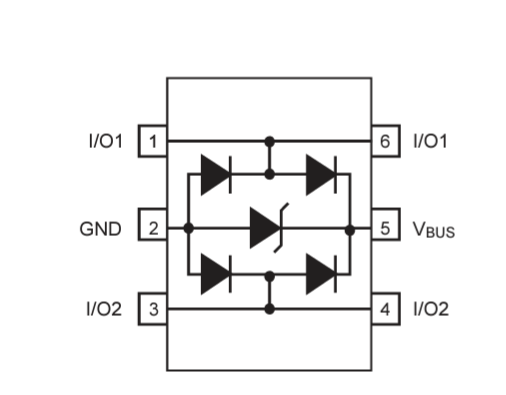
A screenshot of the IC connected to the micro-USB on the pod. pin 5 on the IC connects to the NET “USB_VBUS” that is connected to the USB pin 1. This net is not connected to anything else on the POD.
Hmm. I can see (barely) on the pod that U7 on the Pod is next to the micro usb connector on the Pod, and that the otg lines go from U7 to the Daisy Seed as shown in your annotations.
Is the micro usb on the Seed represented in that schematic? and if so,
Is the micro usb on the Pod a "pass through’ to connect to other devices?
Sorry if these are dumb questions but I might still be confused as to why there are 2 usb connectors.
the daisy seed has 2 usb data connections - one is wired to the USB connector on the seed.
The other is connected from the seed (gpio30, gpio31 and gpio1) to the microusb on the pod through U7.
The software running on the daisy decides if each usb is either host or device mode.
Not a pass-through (unless the software has that functionality).
Everything is powered through the microusb on the seed.
The usb on the pod is not powered from the seed. Any device or host you connect to the pod usb port has to be self-powered.
You have to use the usb on the seed to program it (or the SWD/ST-Link header). It cannot be programmed through the pod usb connection (maybe with a bootloader written for that purpose)
No my friend, I am grateful to you, for explaining what you have so far.
Electro-Smith haven’t provided any of the info you have, and that is saying a lot–about them, not you.
The fact that I am trying to cobble together an introductory document that any manufacturer would have automatically provided is also saying something. E-S’s business model appears to be to have its customers develop the supporting documentation for them, not the other way around. If so, it is baffling to me.
I’ve come to the conclusion I am wasting my time, spinning my wheels, on working on this Guide.
Besides, this should be part of the support documentation that Electro-Smith provides on their website, right next to the ‘add to cart’ button
The Pod is the most consumer-friendly product E-S sells, at places like Perfect Circuit, yet it appears that it is the least supported, documentation wise, explanation wise. I shouldn’t have to refer to a PCB wiring diagram to piece together how the Pod is wired and what the connectors do.
There are 7 videos on the E-S Youtube channel. And not one is about the Pod. Whatever marketing plan E-S has, it appears from my point of view that it is incoherent, if not non-existent. I’ll check back to see the progress of the entire Daisy project, but to me it is like using VCV Rack ver 0.3 or Blender 0.8, both of which had hardcore fans but were ultimately unusable by reg’lar folk
You weren’t wasting your time at all
It’s all part of the journey.
It’ll help to consider the Daisy Pod as a Daisy Seed that already comes with common components, such as LEDs and knobs. So the tutorials that we have posting (and will be posting) will apply to Pod, Patch, and etc. So for example, when we start the audio tutorial series next, you may feel like it’s targeted for Daisy Seed only, but you can follow it just fine with Pod. The main difference is that you can skip the part about connecting an audio jack (it’s already there for Pod!).
And when we get to the hardware configuration series, same thing. This time, you’ll just skip the part about connecting a potentiometer. And technically, you can skip the JSON file part but you can write it from scratch for Pod (you just need to know which pin it is connected to. You of course can ask in the comment about it).
What I personally recommend for you is to take a break from Daisy and focus on learning MaxMSP and gen~ which seems like the language that you’re committing to. And once you’re comfortable, start patching a custom synth. And then, you’re ready to revisit Daisy by flashing that patch! You can use the pod template to figure out how to map the hardware to the synth parameters in your patch. You’re more than welcome to ask questions about it.