How do you connect them? I can’t find a photo anywhere so I don’t know which way around the connector goes.
Patch.Init() uses the submodule. There is no photo of the submodule there. There is only a photo of the daisy seed.
I received Patch.init() recently, and also need to know how to connect the st-link: connector type and orientation.
@tele_player I tried both orientations and neither worked. I am using the boot loader via pd2psd.
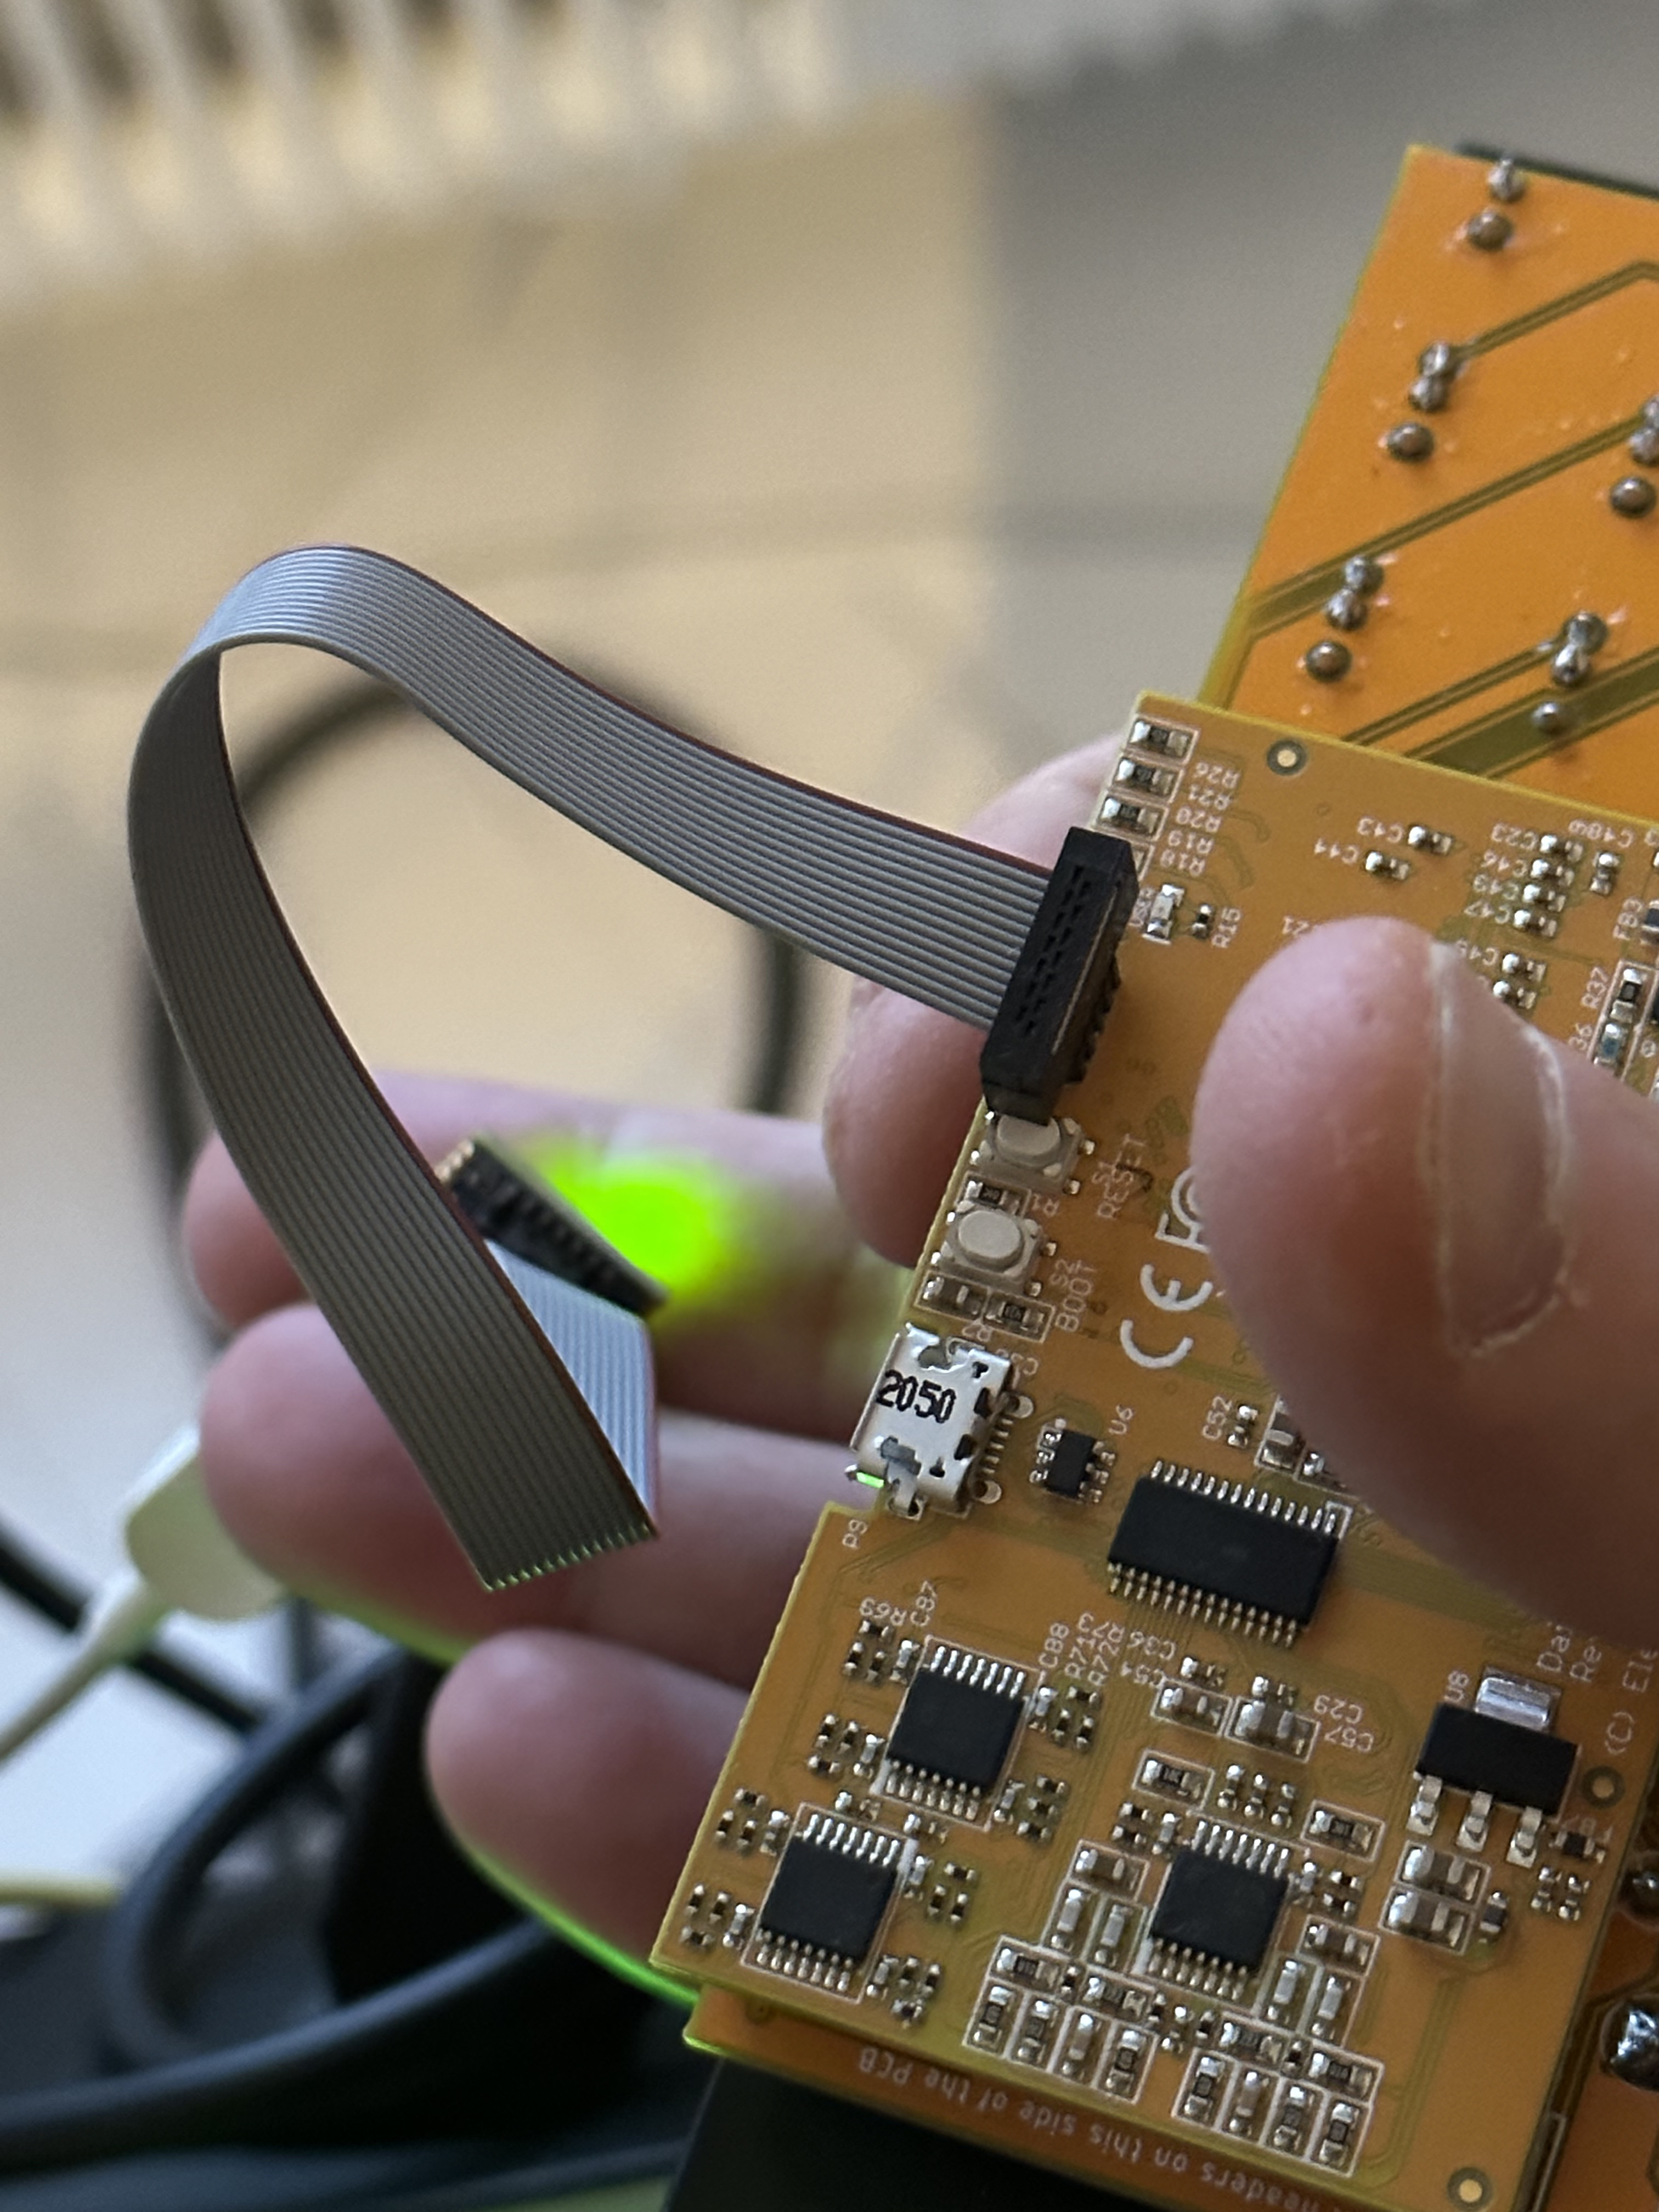
So like the photo but I also tried with the connector on the board the other way around. I have gone back to using the bootloader via USB and resetting each time.
It would certainly be nice if somebody from Electro-Smith would clarify use of the st-link with PatchSM.
I haven’t bought the st-link yet… so I haven’t tried figuring out what’s going on.
Maybe a silly question, but you are powering the device when you try, right? It doesn’t appear that way in the photo…
It is connected to Eurorack power. I disconnected eurorack so that I could take the photo.
Is the ST LINK compatible with the submodule or what? Bloody annoying that they won’t respond.
I finally got around to giving this a go and managed to get it working. I should note that I have the STLINK-V3MINIE (the usb-c version).
I found the grounds on the debug header and compared to the pins on the seed schematic and it appeared to have the same layout, so red stripe on the side with the white lines in the corner (i.e. red stripe on the other side to the reset/boot buttons).
I had a few issues getting it going on the software side (on macOS) so first confirmed that it worked with the STM32CubeProgrammer app and then the openocd command line tool.
In the end I used open-ocd 0.12.0-rc2 (installed via Homebrew) but for some reason I ended up with two different versions of open-ocd (one in the brew dir, one in /usr/local/share) so when running make commands I had to override OCD_DIR=/opt/homebrew/share/openocd/scripts (as this is hardcoded to /usr/local/share/openocd/scripts in libDaisy) but I didn’t need to do that when running the debugger from VS Code for some reason.
Hope that helps.
@ohthepain are you getting any particular errors?
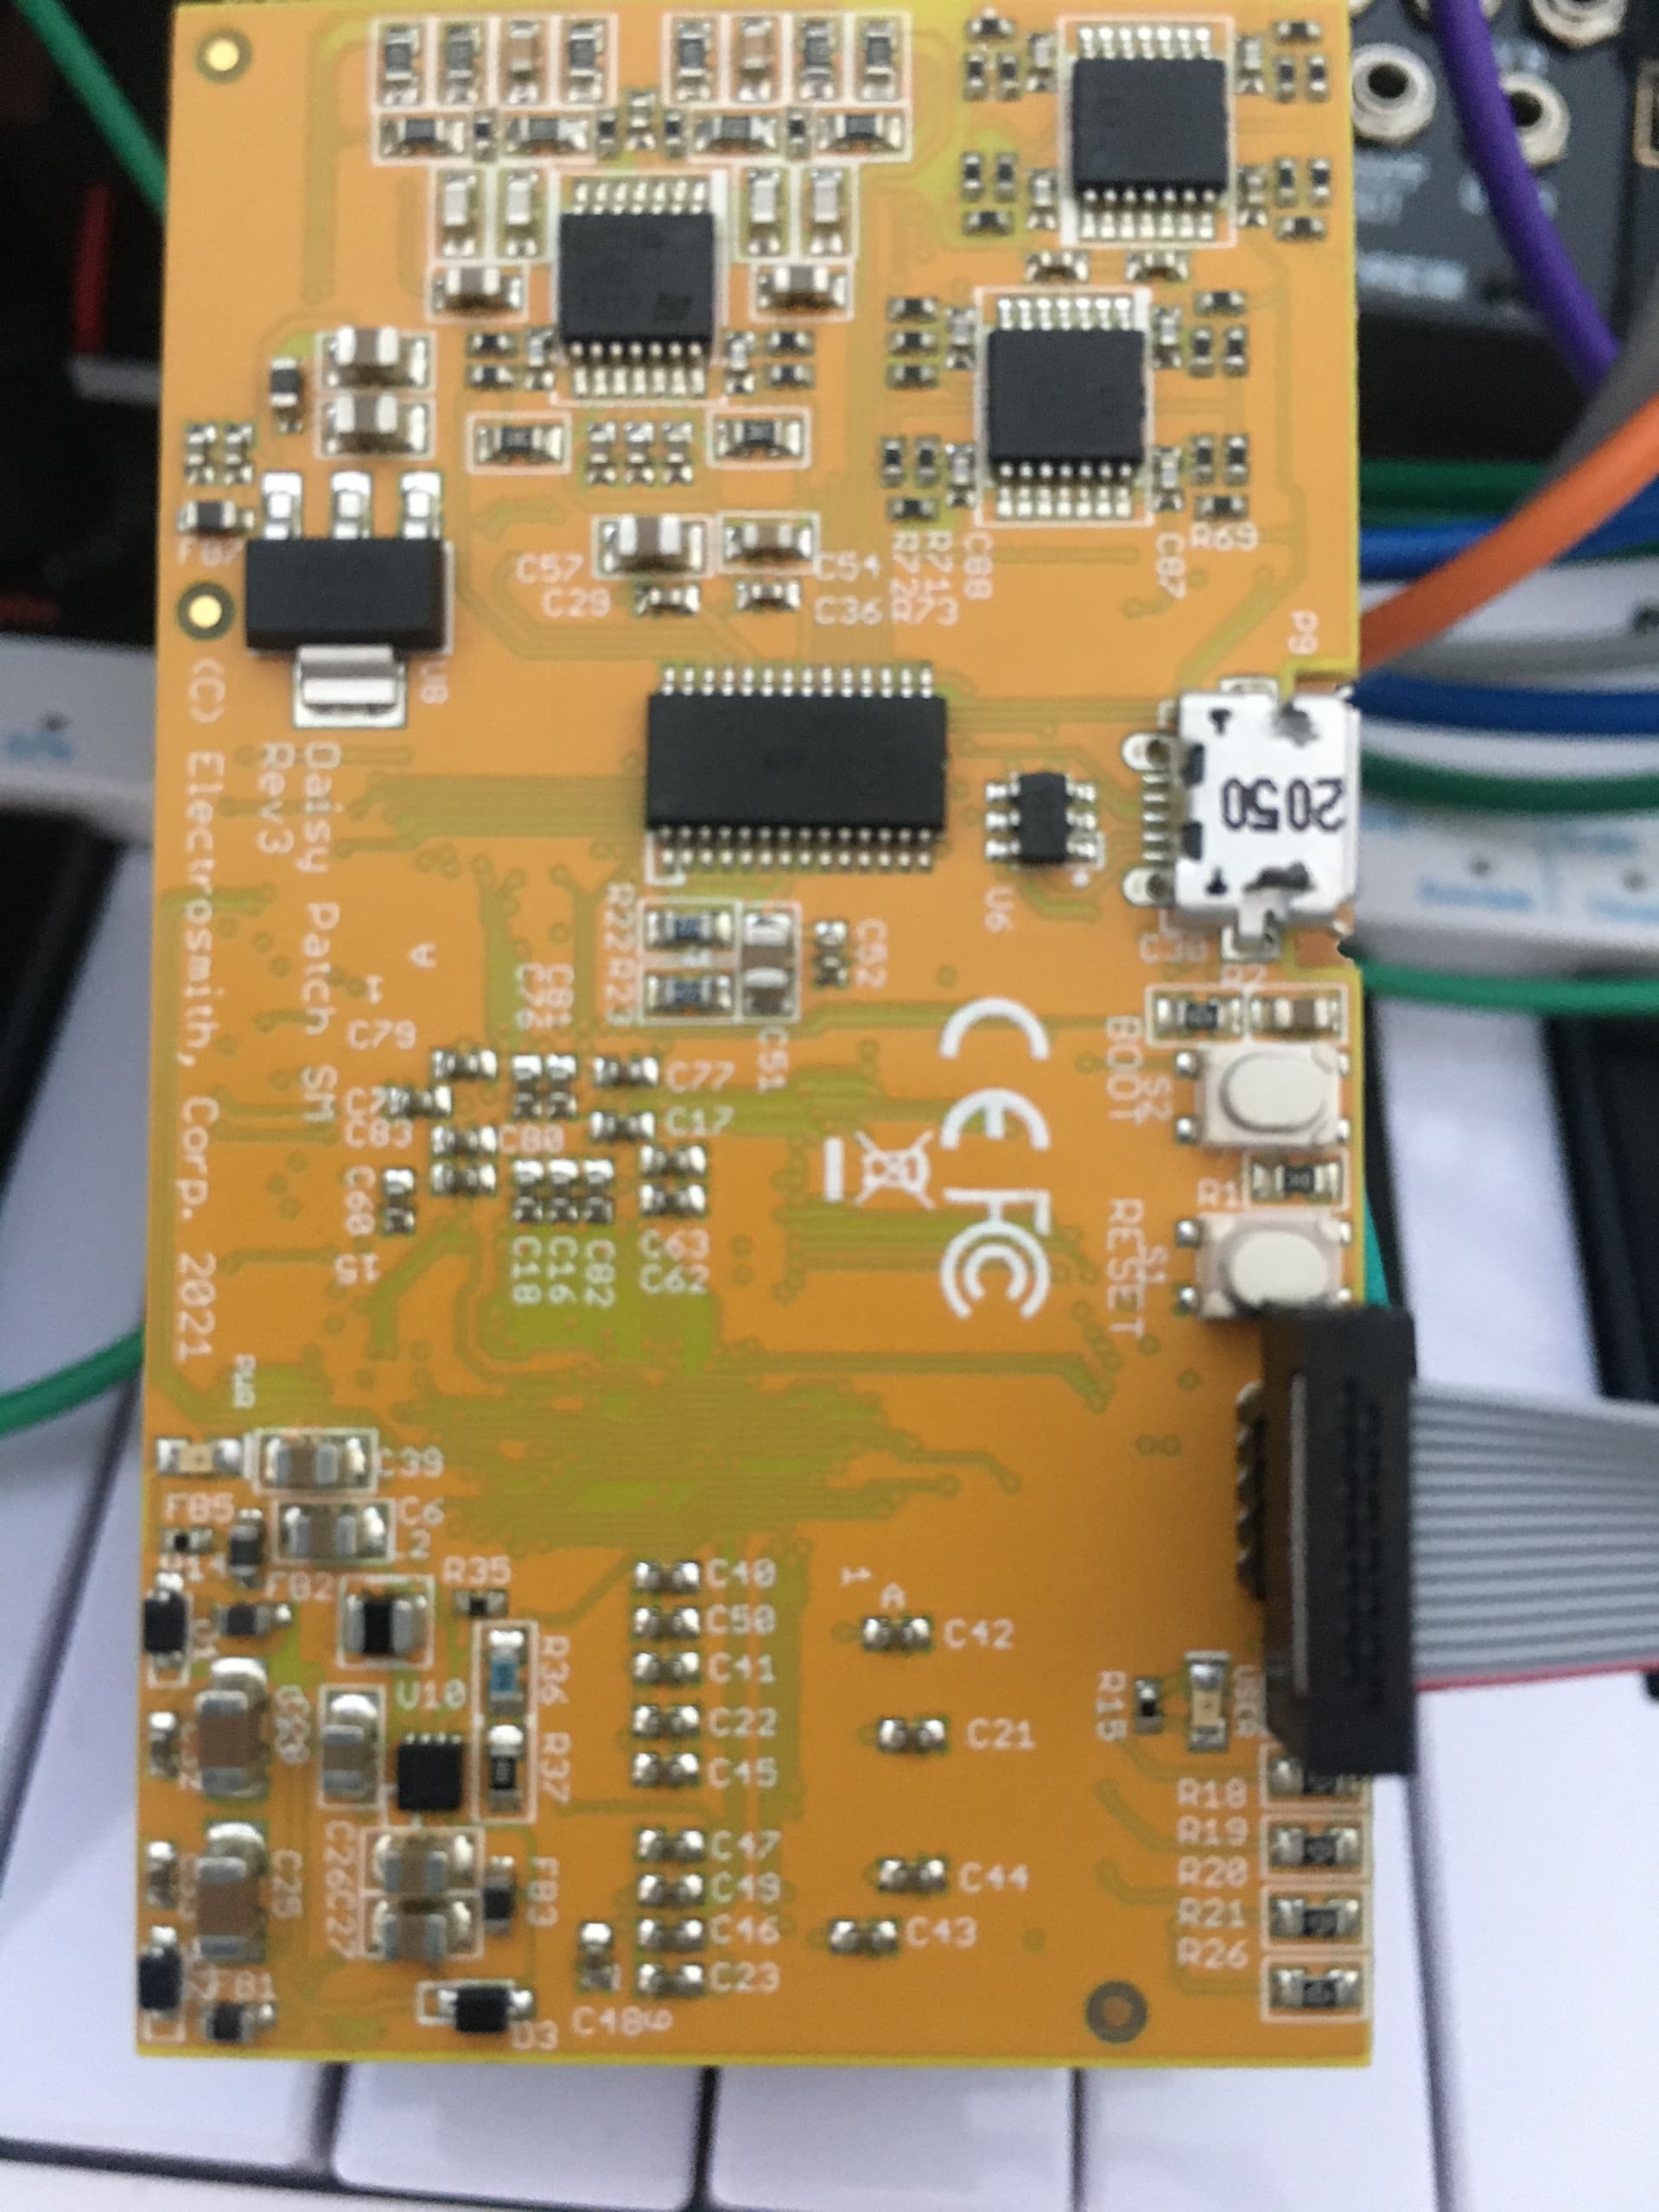
Thanks for the photo. It’s interesting that the connector is offset by one slot compared the seed. I moved the connect to match your photo and still get the same errors.
I’m running
python pd2dsy.py --board patch_init examples/Paul/delay2.pd
My errors are
dfu-util: Warning: Invalid DFU suffix signature
dfu-util: A valid DFU suffix will be required in a future dfu-util release
dfu-util: No DFU capable USB device available
make: *** [program-dfu] Error 74
I don’t have any experience with embedded. Maybe you could give me an openocd command line to try?
Also, I could not figure out how to install open-ocd 0.12.0-rc2 with home-brew.
Cheers!
I’m not sure you’ll be able to use DFU over the stlink interface, stlink is using JTAG or SWD as an interface. I’m not in front of my machine right now, but I believe there is a make target that uses OCD to program, which I believe is set up to work with the stlink.
Cheers
I recently started using ST-LINK and here’s what I did.
cd into the folder that’s created after you ran that line.
I’m guessing a new folder called “examples/Paul/delay2” was created in the pd2dsy folder.
So in the terminal…
cd examples/Paul/delay2
and then
make program
It’s a bit of a hassle when you make changes in a patcher and want to overwrite that folder.
You need to cd - to go back to pd2dsy and rinse and repeat. That said, it sure beats pressing those tiny buttons tho.
The angle might be a bit misleading, I had the pins centred in the header.
I haven’t used pd2dsy, but I’m pretty sure DFU is for programming over USB. If you’re able to I think you want to run make program rather than make program-dfu.
I ran openocd -f interface/stlink.cfg -f target/STM32h7x.cfg to verify it could connect.
You need to use --HEAD like so: brew install --HEAD open-ocd.
I have actually switched from PD to C++. But I tried the command lines you suggested and everything seems to work. I don’t know if I fixed something while getting set up for C++. I plugged in the STLINK properly and can flash without hitting the reset buttons. Woo hoo!
make program works and I can flash the device without hitting the reset buttons.
I tried openocd -f interface/stlink.cfg -f target/STM32h7x.cfg and it seems to work, or at least it seems to launch and wait for a debugger to connect.
➜ delay2 git:(master) ✗ openocd -f interface/stlink.cfg -f target/STM32h7x.cfg
Open On-Chip Debugger 0.11.0
Licensed under GNU GPL v2
For bug reports, read
Info : auto-selecting first available session transport “hla_swd”. To override use ‘transport select ’.
Info : The selected transport took over low-level target control. The results might differ compared to plain JTAG/SWD
Info : Listening on port 6666 for tcl connections
Info : Listening on port 4444 for telnet connections
Info : clock speed 1800 kHz
Info : STLINK V3J7M2 (API v3) VID:PID 0483:374E
Info : Target voltage: 3.260679
Info : stm32h7x.cpu0: hardware has 8 breakpoints, 4 watchpoints
Info : starting gdb server for stm32h7x.cpu0 on 3333
Info : Listening on port 3333 for gdb connections
3 Likes
Thank you for all these info! I have a question about the connection between the cable and the board.
I guess you have soldered a header? If that’s the case, do you have a part number for that header? Or is everything in the kit sold by - for instance - Mouser? https://www.mouser.com/datasheet/2/389/stlink_v3minie-2953370.pdf
You need to purchase and solder a 10 position 1.27mm pitch header. I think this is the one that I got: https://www.mouser.com/ProductDetail/Amphenol-FCI/20021111-00010T4LF?qs=nwYJ12Fl9gR8B5xkaYs9gA%3D%3D
Thank you Whatnot, this is useful.
A more sustainable solution is to change the pd2dsy.py file:
search for:
build_process = subprocess.Popen(f’make program-dfu -C {daisy_src}',
Replace with:
build_process = subprocess.Popen(f’make program -C {daisy_src}',