Thank you!
1 Like
Also feel free to ask if you have any specific questions once you get started!
1 Like
hi all!
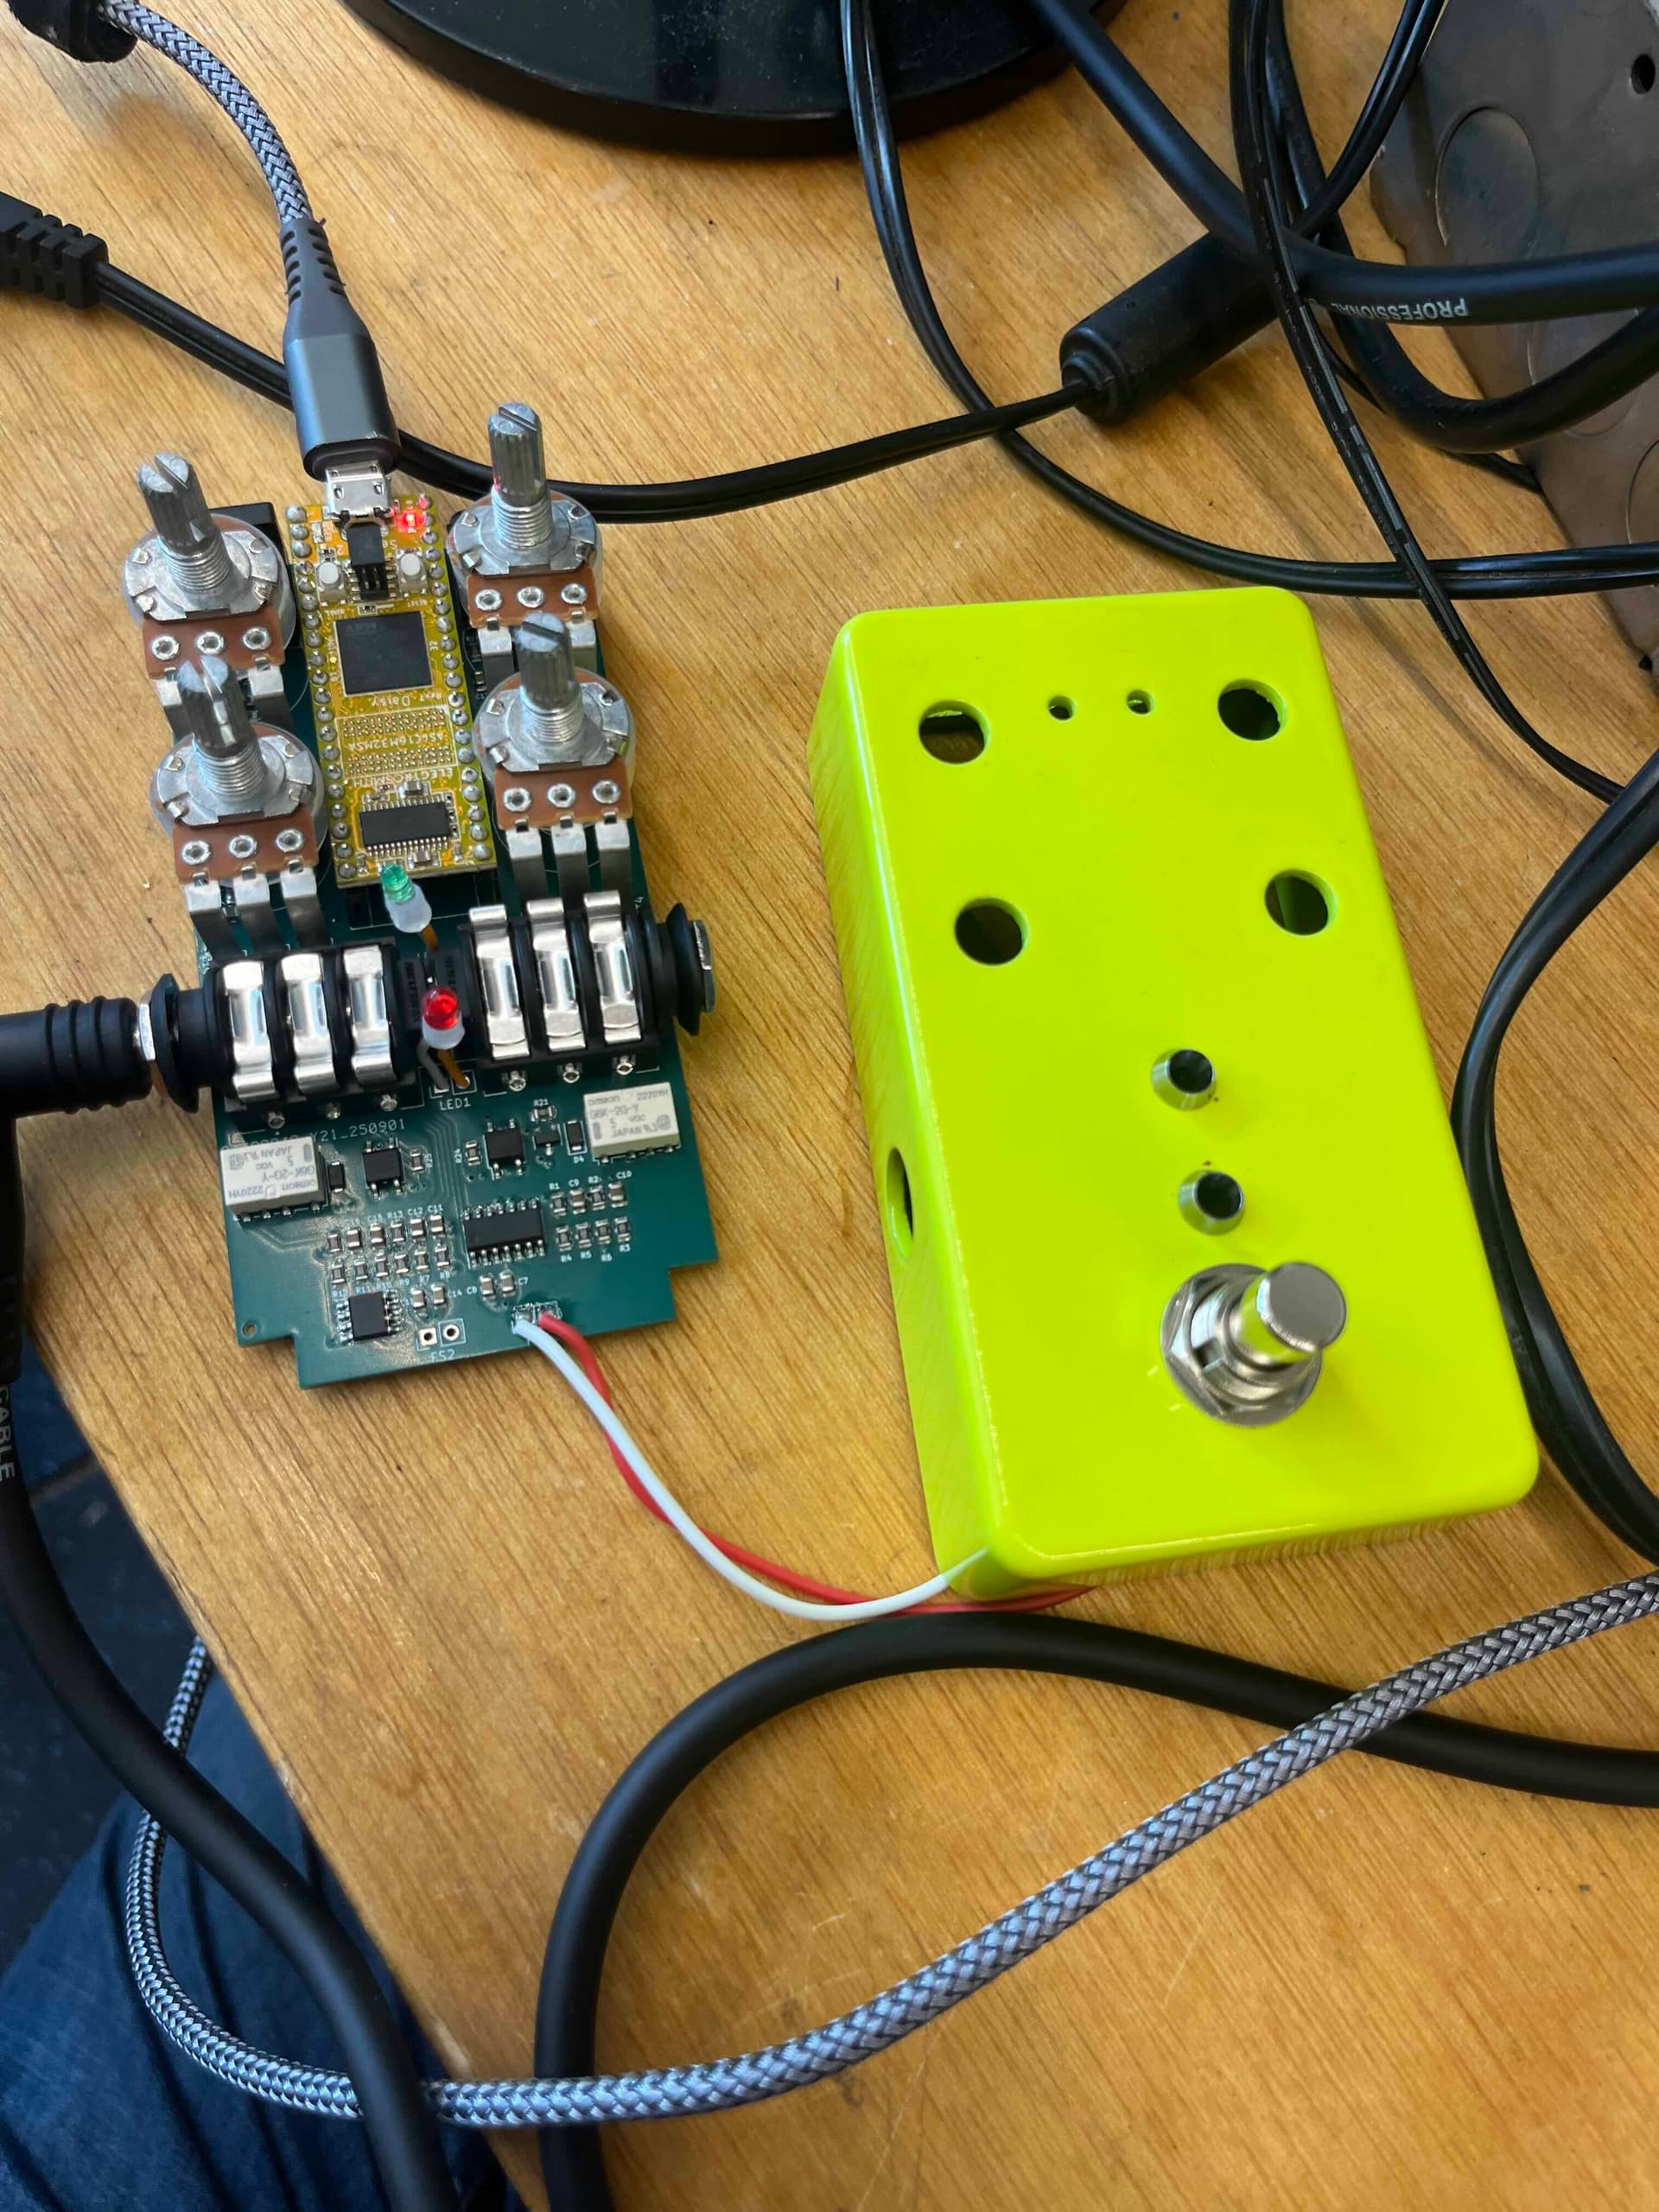
I bought a big batch of these pedals! using the guide of @kshep and this incredible resource, I used JLC to fab the board, and tayda to drill the cases.
they look good!
I’m trying to use the wonderful library from IDMPedals to get sound on these boards, using Oopsy~ and Gen~. These wonderful examples are really accessible and it’s easier for me to hack this way rather than do everything in pure C++.
I’m having a bit of a problem. I think I got my custom JSON file working okay, but I’m not sure how to get sound out! I see that pin13 of the schematic is “enable audio mute”, which toggles the relays for the true bypass. But I’m not really sure how to set this up in the JSON file. I am able to upload code (no errors in the JSON) but not able to get sound out.
Any ideas? Or just, is there a way I can manually toggle the relays off/on? wire the input to the relays and send to 3.3v? or GND?
{
“name”: “peddle”,
“som”: “seed”,
“defines”: {
“OOPSY_TARGET_PEDDLE”: 1,
“OOPSY_TARGET_HAS_MIDI_INPUT”: 1,
“OOPSY_TARGET_HAS_MIDI_OUTPUT”: 1
},
“max_apps”: 8,
“audio”: {
“channels”: 2
},
“components”: {
“knob1”: {
“component”: “AnalogControl”,
“pin”: 24
},
“knob2”: {
“component”: “AnalogControl”,
“pin”: 25
},
“knob3”: {
“component”: “AnalogControl”,
“pin”: 26
},
“knob4”: {
“component”: “AnalogControl”,
“pin”: 27
},
“knob5”: {
“component”: “AnalogControl”,
“pin”: 28
},
“knob6”: {
“component”: “AnalogControl”,
“pin”: 29
},
“sw1”: {
“component”: “Switch”,
“pin”: 6
},
“sw2”: {
“component”: “Switch”,
“pin”: 7
},
“led1”: {
“component”: “Led”,
“pin”: 29
},
“led2”: {
“component”: “Led”,
“pin”: 30
},
“expression”: {
“component”: “AnalogControl”,
“pin”: 15
}
},
“aliases”: {
“led1”: “led_fs_1”,
“led2”: “led_fs_2”,
“switch”: “sw1”,
“switch1”: “sw1”,
“switch2”: “sw2”,
“knob”: “knob1”,
“ctrl”: “knob1”,
“ctrl1”: “knob1”,
“ctrl2”: “knob2”,
“ctrl3”: “knob3”,
“ctrl4”: “knob4”,
“ctrl5”: “knob5”,
“ctrl6”: “knob6”
}
}
1 Like
Hello guys. Great job! Really. I see that you build indifidual pedals for each effect, which is not the most cost effective solution I guess. I’m thinking of building a Fly Rig pedal that has the basic stuff Drive, Amp Sim, Chorus/Tremolo/Flanger, Tap Delay, Reverb and Cab Sim. Has anyone tryied to use 5-6 simultanious effects, chained in one Daisy ceed?
You’re in a good place, then. I am blind, but I’ve had a couple of PCBs designed, fabbed and assembled. I am both a software and hardware engineer and i was very pleased with the resources available to hobbyists. The only downside at the moment is that JLCPCB has a 55% tarrif hanging around their neck. ![]() But we do have domestic PCB fab/assembly houses.
But we do have domestic PCB fab/assembly houses.
Hi Burpydave, I’m after a PCB if you still have any spare? I’m based in Cornwall and have been designing violin specific effects on the Terrarium. I have a spare Seed and enclosure and would love to upgrade to one of these designs :^)
You can definitely chain multiple effects together in software on the daisy. The software here doesn’t do it out of the box because it focuses on individual effects, but you could easily make a specific effects module for this software that combines more than 1 effect.
1 Like
I’ve found the effects super extensible as they’re all in classes in separate files. Include what you want in your project and chain the method calls together in whatever order works.
There are hardware limitations to consider though, mainly flash memory limit and processing limit. For cab sim you will be doing convolution, that’s very processor intensive, as is reverb. If you use partitioned convolution you can use a simple reverb like the Mutated Instruments reverb but the Daisy Seed won’t happily convolve decent length IRs and run the Cloud Seed reverb at the same time, for instance.
A single pedal has limited controls anyway. For myself it’s much better to use multiple pedals and set them up to do different things. That way the setup is modular, without having to re-program things, and has enough controls and processing power to get the most out of the effects.
1 Like
Hello all,
Brand new here, literally signed up cuz I came across a video of this pedal on YouTube and am an avid builder of pedals so I’d love to get ahold of a PCB if anyone has one available. Maybe even two if possible so I could build one for a friend. Hoping for the SMD version and one that hasn’t been presoldered as I like doing that silly business myself.
kshep or anyone else who may have one available please drop me a line.
Many thanks!
1 Like
I have a few leftovers but the SMD parts are preassembled from JLCPCB so might not be up your alley. Also I’m based in Sweden and utterly unfamiliar with transactions to other countries.
So, basically, if anyone in my neighborhood is interested I can help..
Edit: @Coward, I really should have said for you to try your hands on getting a few PCBs produced by JLCPCB (or any of the other producers really). It’s not expensive and if you haven’t tried a good learning experience. There are docs for doing it in the repository.
Thanks for the reply.
I have considered having some PCBs made, though I didn’t get around to seeing how much it would cost just yet as I imagine they are based in the US and I am in Canada. Also worried I’d somehow mess something up as I am prone to that sort of thing ![]() . But I will give it some thought and investigate pricing.
. But I will give it some thought and investigate pricing.
Thanks again!
JLCPCB is based in China, not US. Definitely super easy to order from. If you just want the PCBs without the SMD soldered on it will be super cheap.
Ah, okay, that’s good. I will look into this option then. If I need to order a minimum of 5 PCBs then I guess I’ll just solder together 5 pedals. Aw shucks! Haha
That’s the spirit! ![]()
Seriously though, not to prattle on forever. When I order to Sweden, 5 PCBs comes out to $5, that includes shipping if I chose the slow alternative. In my book that is crazy cheap, the only drawback is that it takes a few weeks to get here.
Ok, so, I downloaded KiCad and am attempting to open the proper files and make Gerber and Drill files and/or use the Zipped files on GitHub and… I’m sorry… I don’t have a clue what I am doing. ![]()
I’m sure it’s me and not the instructions but I’ve never used a program like KiCad before and I simply don’t know what files I’m supposed to download or import or do what with and it is all Greek to me. If anyone has a few minutes to break this down for me like I’m in kindergarten I would hugely appreciate it. I feel dumb as rocks and like a huge bother but I just can’t even get step one started and it’s very frustrating.
For the record I have KiCad 9.0 on a brand new Mac Mini M4 Pro using Safari. My experience with a program like KiCad is… today. For like 45min. And I have no idea what gerber and drill files are.
Again, apologies and many thanks if anyone can help me be less useless
I buggered around with this more and, yeah, sorry again, but I’m clueless. I downloaded every single file on the GitHub site and none of them will open on KiCad. Is it because I’m using 9.0? Or, more likely, am I just doing something wrong? Apologies again, I could solder this thing with my eyes closed but this computer stuff is beyond me. Sigh… ![]()
Oh man, I’m sorry D: You don’t need Kicad (although that can be fun and games too ![]() ).
).
There are prebuilt gerber and drill files. On the “Build the hardware” page, in the Generate Gerber & Drill chapter, the second link is to a zip file with all the production files. Now thinking about it I do recall I didn’t see the link at first.
Note that there are three versions of the PCB, two of them are with SMD, you have to make sure you are reading the instructions for the right one to get the correct files. I built the 125b (with display) which is also most recent.
With the gerbers, follow Step 4 (these are the 125b instructions) but don’t do the bits about PCB Assembly and you should be able to order just the PCB.
Sorry, I’m still quite lost.
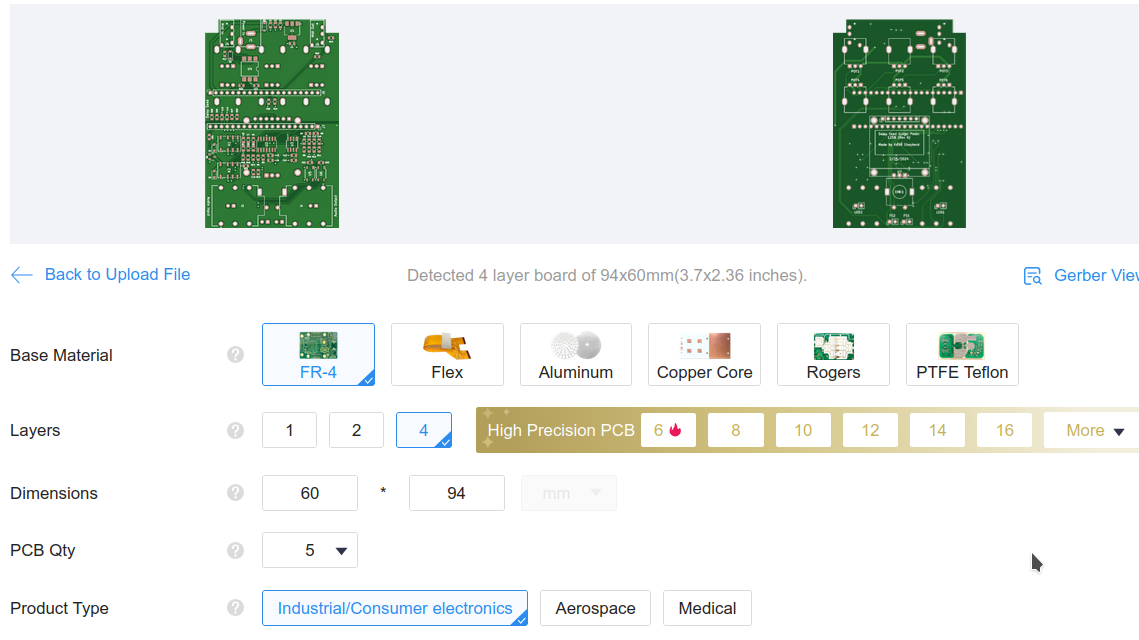
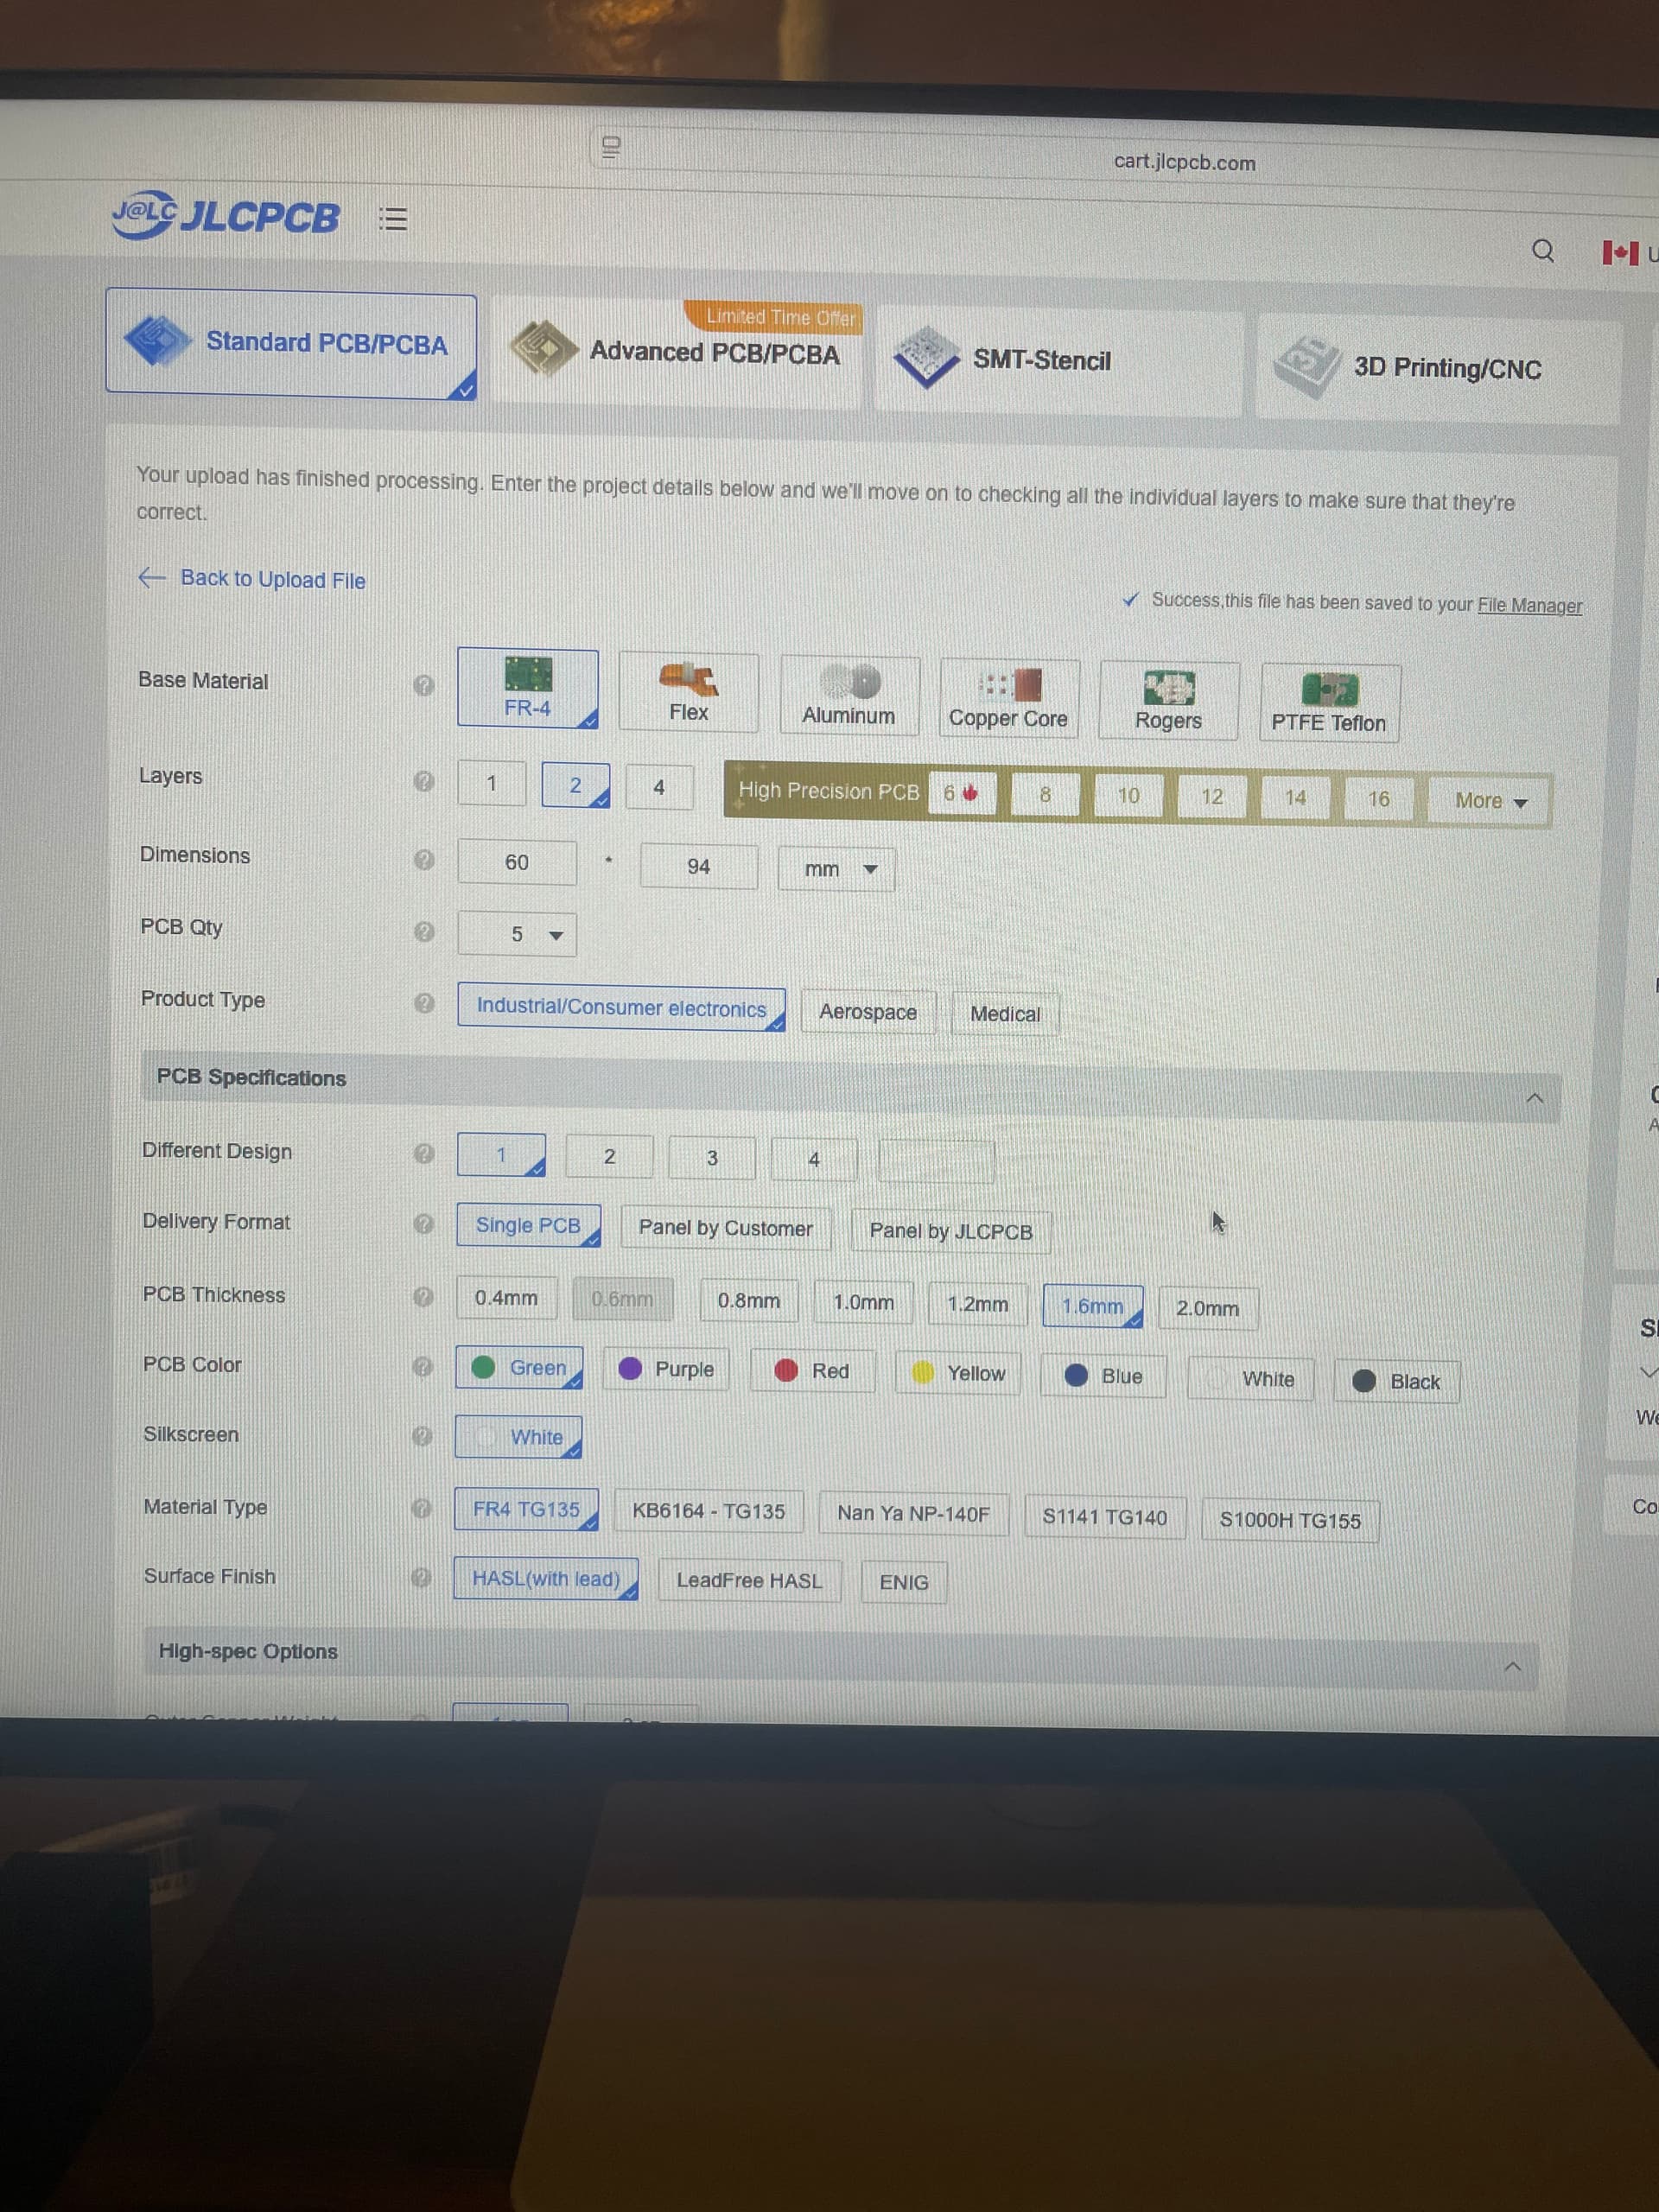
I upload the zipped files and it says they’re uploaded but at no point does it show me the PCBs as demonstrated on the build guide on GitHub. It also didn’t default the Dimensions of the PCB, I had to enter those numbers myself. I can select everything else as the guide states but as I said at no point does it show me the PCBs, even if I select PCB Assembly. So without seeing the PCBs I’m worried I’ll end up paying like $30 for blank PCBs or something.
is it because I’m using a Mac? Some of the screens haven’t been identical to the build guide tho I realize they are screenshots from a while back. I’ve included screen shots of what I see.
EDIT: it’s only letting me post one photo and won’t let me reply again to post another. ![]()
I’ve ordered many boards from JLCPCB using a Mac. It always shows me what the board will look like.
Huh, that is weird. Could you try opening the zip file you downloaded?
If it’s the 125b it should contain a folder ‘DaisySeedPedal125b-Rev6-gerbers’ with a lot of files in it.
If that part looks fine I can only suggest you try the upload again. I know it has happened to me that the upload did not finish. Rarely though.
After the upload it should show the following information: