macOS C++ IDE

@flavius Intellisense is a Visual Studio thing, right? PlatformIO on Atom doesn’t seem to have that.

Ah! Yes, it indeed is a VS Code thing, I assumed it was apart of PIO. It’s the last option in the list when you click the alien head in the side bar.

image

1 Like

So, IntelliSense does seem to work for me. It can resolve includes such as daisy_seed.h but when I compile it gives me an error like this:

In file included from lib/libDaisy/src/dev_codec_pcm3060.c:2:0:
lib/libDaisy/src/util_hal_map.h:4:10: fatal error: stm32h7xx_hal.h: No such file or directory

It seems to be seeing some includes but not all of them. Not sure what could be different between our setups. Could it be becasue I used the lib folder inside the project? I’ll try moving it tomrrow.

OK, I’ve managed to get the Blink example compiling and was able to flash it to the daisy over USB.

I cloned libDaisy into the lib folder of the project (if it’s inside lib there is no need to add lib_extra_dirs) then added the following library.json file into the root of the library:

{
    "build": {
        "flags": [
            "-I Drivers/STM32H7xx_HAL_Driver/Inc",
            "-I Middlewares/ST/STM32_USB_Device_Library/Core/Inc",
            "-I Middlewares/ST/STM32_USB_Device_Library/Class/CDC/Inc",
            "-I Middlewares/Third_Party/FatFs/src"
        ],
        "srcFilter": [
            "+<*>", 
            "+<../Drivers/STM32H7xx_HAL_Driver/Src>",
            "+<../Middlewares/ST/STM32_USB_Device_Library/Core/Src>",
            "+<../Middlewares/ST/STM32_USB_Device_Library/Class/CDC/Src",
            "+<../Middlewares/Third_Party/FatFs/src>"
        ]
    }
}

This is needed to tell platformio where all the source and include files are located.

Then copied the Blink.cpp example into the project’s src folder.

My platformio.ini is:

    [env:electrosmith_daisy]
    platform = ststm32
    board = electrosmith_daisy
    framework = cmsis
    upload_protocol = dfu

For some reason I get an error after uploading to the daisy, but it still works anyway because the LED started to flash.

Next step is to do a similar thing for DaisySP library, and get an example with audio working.

2 Likes

Just a thought. If you’re cloning libraries into multiple locations, symbolic links might be better.

I’m switching over from PlatformIO on Atom to PlatformIO in VSCode so that we don’t have any editor based peculiarities / differences to deal with … It will take some time to install now but I’ll try the solution @pigatron found and see if I can successfully compile blink as well.

The only thing I had to add to the DaisySP library was this in library.json:

{
    "build": {
        "srcDir": ""
    }
}

That’s because, by default, PlatformIO looks in the src directory for the source files, but the main include file daisysp.h is in the root directory, so using an empty string makes it look in root. After adding that all the examples I tried are compiling fine.

All this would probably work in Atom as well, but after having made the switch myself I think VSCode is probably better for all the extra features.

Of course, you don’t have to have the libraries in the lib folder, you can put them wherever you want and reference them using lib_extra_dirs and this should should still work.

Ideally we’d get these or similar library.json files checked into the git repos for the libraries, then we would only need to reference the library names in the ini file and they would be brought in automatically.

1 Like

Just tried the solution you suggested @pigatron and using both library.json snippets, I can get both libDaisy and DaisyDSP to work. I can also flash the chip both via USB (DFU) and STlinkV2.

However, if I upload one of the simple examples, e.g. ADenv or ADSR I end up with a static saw-toothish signal on the outs.

The Arduino counterpart of these examples run fine which leads me to believe something is going wrong in the init of the peripherals … maybe blocksize or samplerate is wrong … again more detective work for another day. Still need to try the “official” toolchain.

PS Blink now works as intented

Yeah you’re right @MakingSoundMachines.

Just uploaded the oscillator example from the web uploader and got a perfect sine wave on my scope.

Uploaded the same example using PlatformIO and got something quite random:

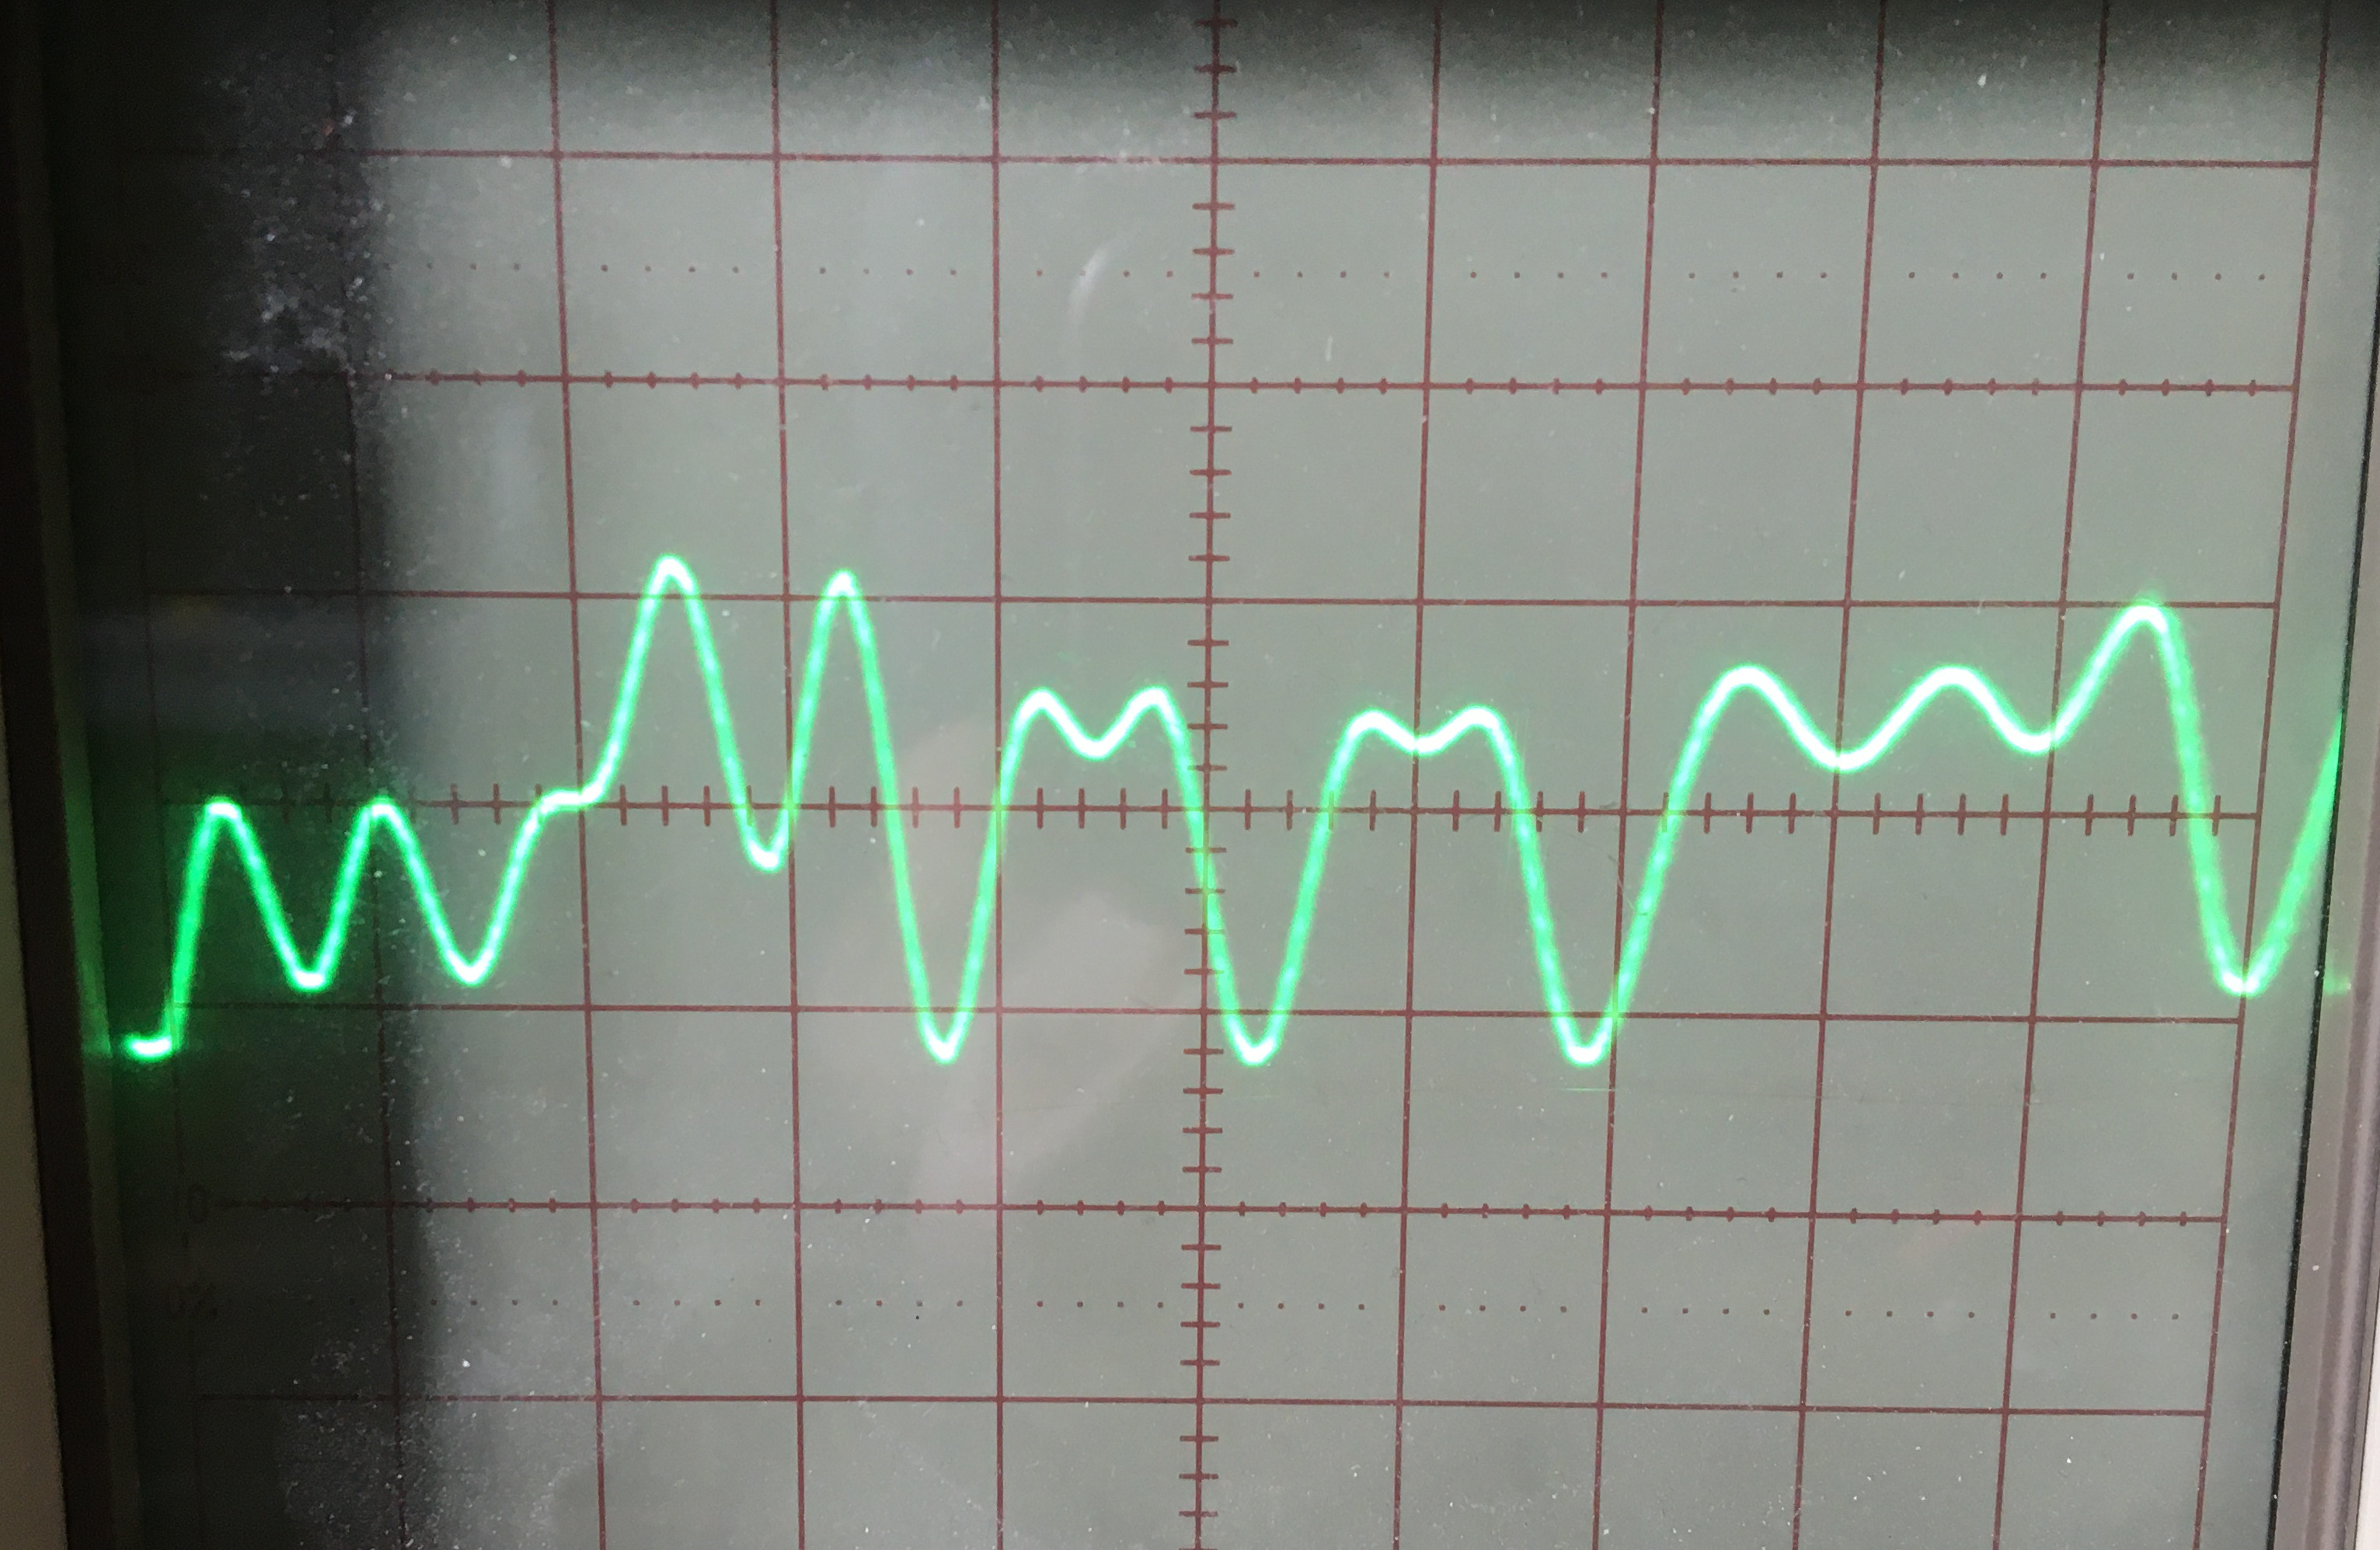
So yeah, something is not right.

OK, completely different approach…

Grab the DaisyDuino library, stick it in lib folder, use the arduino framework.

Tested with the oscillator example in the main.cpp and it works perfectly!

No messing around with json files at all.

1 Like

@pigatron yes that would work. the other thing I’ve been trying yesterday that also works well, is editing the code from one of the example files in VSC and then compiling and uploading with the make / command line toolchain.

You have to adjust filenames in the makefile for new projects.

It’s still C++ (so is Arduino), and you get the synthax highliting etc. you just compile somewhere else.

This is kind of what I am doing - using VSCode and using modified make files. Running those from the terminal in VSCode means don’t have to jump around. Seems to work well. The only thing I haven’t decided yet is whether to just copy the libdaisy and daisysp libraries into the same folder and point to those, or whether to add them as git submodules so I can keep them up to date (which I haven’t tried yet).

What are you guys/girls doing for debug? I don’t have an ST-Link (and I’m not sure I would know what to do with one). Is there a way to print back to USB connected term like there is in Arduino?

I’m doing something similar to @MakingSoundMachines and @dataveg by the sounds of it - editing the .cpp files in VSCode via a PlatformIO project, adding the lib_extra_dirs path to platformio.ini (requires pressing the Rebuild IntelliSense Index button) and then running the make and make program-dfu commands in the VSCode terminal to compile and upload. I find it pretty convenient because you can right click on something in the code and ‘go to definition’ or ‘go to references’, and VSCode will go and open the relevant include files.

Has anyone got a debugging solution working yet on Platform IO yet? Or any other method on mac for that matter? I feel that going beyond simple examples may be very challenging without any debugging!

1 Like

@adam_f I’d be interested in the debugging possibilities / methods as well! Hints would be welcome!

Hi, yeah I managed to get the debugging working (with a ST-Link and JTAG adaptor) in VSCode on mac last night, with the help of shensley over on another thread. As far I remember here are my steps:

Install Daisy mac toolchain with homebrew as per the Daisy wiki.

Update ST-Link firmware if not up to date - I had to do this on windows, as STLink utility is only for windows.

Plug in ST-Link to Daisy using jtag connector

Also plug in Daisy to computer using USB

Install openOCD using xpack: https://xpack.github.io/openocd/install/
(also need to install xpm, follow the link on that page)

Add openOCD install path to $path from terminal:

sudo nano /etc/paths

ctrl-x to exit, Y then enter to save.

Start a fresh terminal.

Test openOCD from terminal with:

openocd -f interface/stlink-v2.cfg -f target/STM32h7x.cfg

You should get an output like this:

Info : Listening on port 6666 for tcl connections

Info : Listening on port 4444 for telnet connections

Info : clock speed 1800 kHz

Info : STLINK V2J34S7 (API v2) VID:PID 0483:3748

Info : Target voltage: 3.175214

Info : stm32h7x.cpu0: hardware has 8 breakpoints, 4 watchpoints

Info : starting gdb server for stm32h7x.cpu0 on 3333

Info : Listening on port 3333 for gdb connections

Download and install GNU arm tool chain:

https://developer.arm.com/tools-and-software/open-source-software/developer-tools/gnu-toolchain/gnu-rm/downloads

Install Cortex Debug extension for VS Code (search for it on VS Code View -> Extensions)

Download STM32H750x.svd file from here:

https://github.com/posborne/cmsis-svd/tree/master/data/STMicro

Copy STM32H750x.svd into main .vscode directory

Create new workspace in VSCode and put the DaisyLibrary in the directory

Create project folder and write .cpp file or use example file.

Copy in make file example, change to correct paths and file names
add in line: DEBUG = 1 to make file (new line under Target = XXX)

In a new terminal in VSCode cd to project directory and type

make

This will compile program. Then press reset and boot buttons on daisy and type (in terminal):

make program-dfu

(should now flash Daisy)

Create launch.json file in VS Code by clicking on Run -> Add Configuration

Replace all text in launch.json with the following:

{
    // Use IntelliSense to learn about possible attributes.
    // Hover to view descriptions of existing attributes.
    // For more information, visit: https://go.microsoft.com/fwlink/?linkid=830387
    "version": "0.2.0",
    "configurations": [
        {
            "name": "Cortex Debug",
            "cwd": "${workspaceRoot}",
            "executable": "{$workspaceRoot}/build/YOURFILENAME.elf",
            "request": "launch",
            "type": "cortex-debug",
            "servertype": "openocd",
            "configFiles": [
                "interface/stlink.cfg",
                "target/stm32h7x.cfg",
            ],
            "openOCDLaunchCommands": ["init", "reset init"],
            "runToMain": true,
            "svdFile": "./.vscode/STM32H750x.svd"
        }
    ]
}

Update executable location to point at your recently created .elf file.

Hit debug button, then green triangle at the top left (Cortex Debug). Add in breakpoints and watches as necessary, step through program in debugger.

Hopefully that helps! The Cortex Debug extension supports other debugger hardware as well, but I haven’t tried.

Cheers,

Adam

4 Likes

awesome thanks for the writeup! will try this later!

I made this to attach Daisy to eBay clone STLink.

Bought a double-end header cable and used half.

4 Likes

Partial success. Thanks to Ethan I have now built a working example with STM32CubeIDE on Catalina and flashed via clone STLINK to run. At least this supplies a single write to flash setup without needing Boot/Reset presses.

It’s only partial as I don’t have the Debug facilities working (yet). Seems a common Eclipse issue so can hopefully crack it.

2 Likes

Actually, seems such a common topic because hard to crack! Tried a myriad of -g -DDEBUG flags without success.

What are you guys/girls doing for debug? I don’t have an ST-Link (and I’m not sure I would know what to do with one). Is there a way to print back to USB connected term like there is in Arduino?

I have USB serial working in PlatformIO + Atom with the following platformio.ini settings:

[env:electrosmith_daisy]
platform = ststm32
board = electrosmith_daisy
framework = arduino
upload_protocol = dfu
build_flags = -w -D PIO_FRAMEWORK_ARDUINO_ENABLE_CDC -D USBCON -D 
USB_MANUFACTURER="Unknown"

I don’t totally know what those settings do :slight_smile: I yanked em from Difficulty with getting USB serial [USB CDC] working. Generally speaking, I have no idea what I am doing, but hopefully that might help!

1 Like