Hi folks. Even though it feels like a shameful plug, Electrosmith recommended I post here
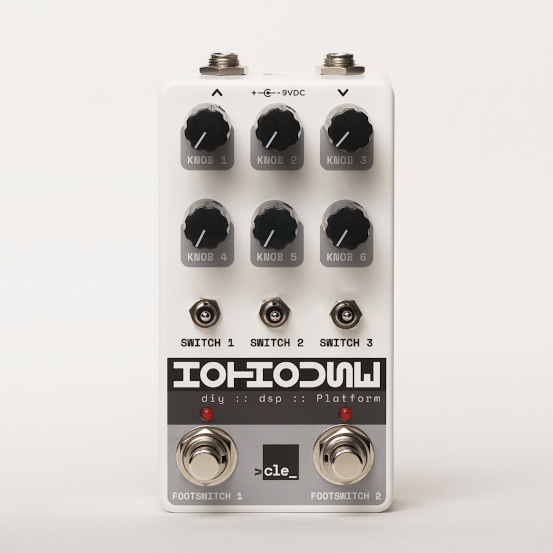
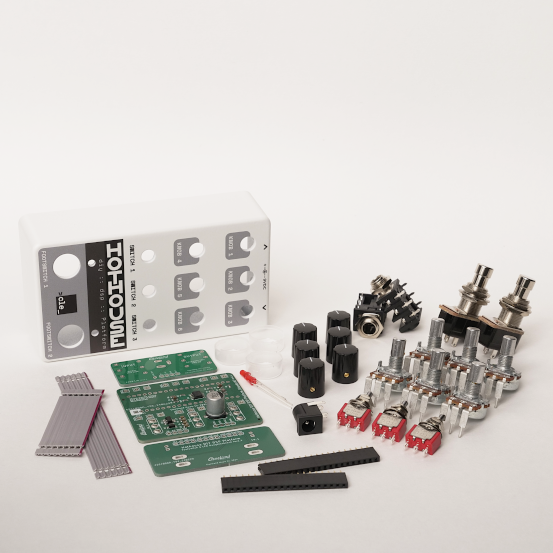
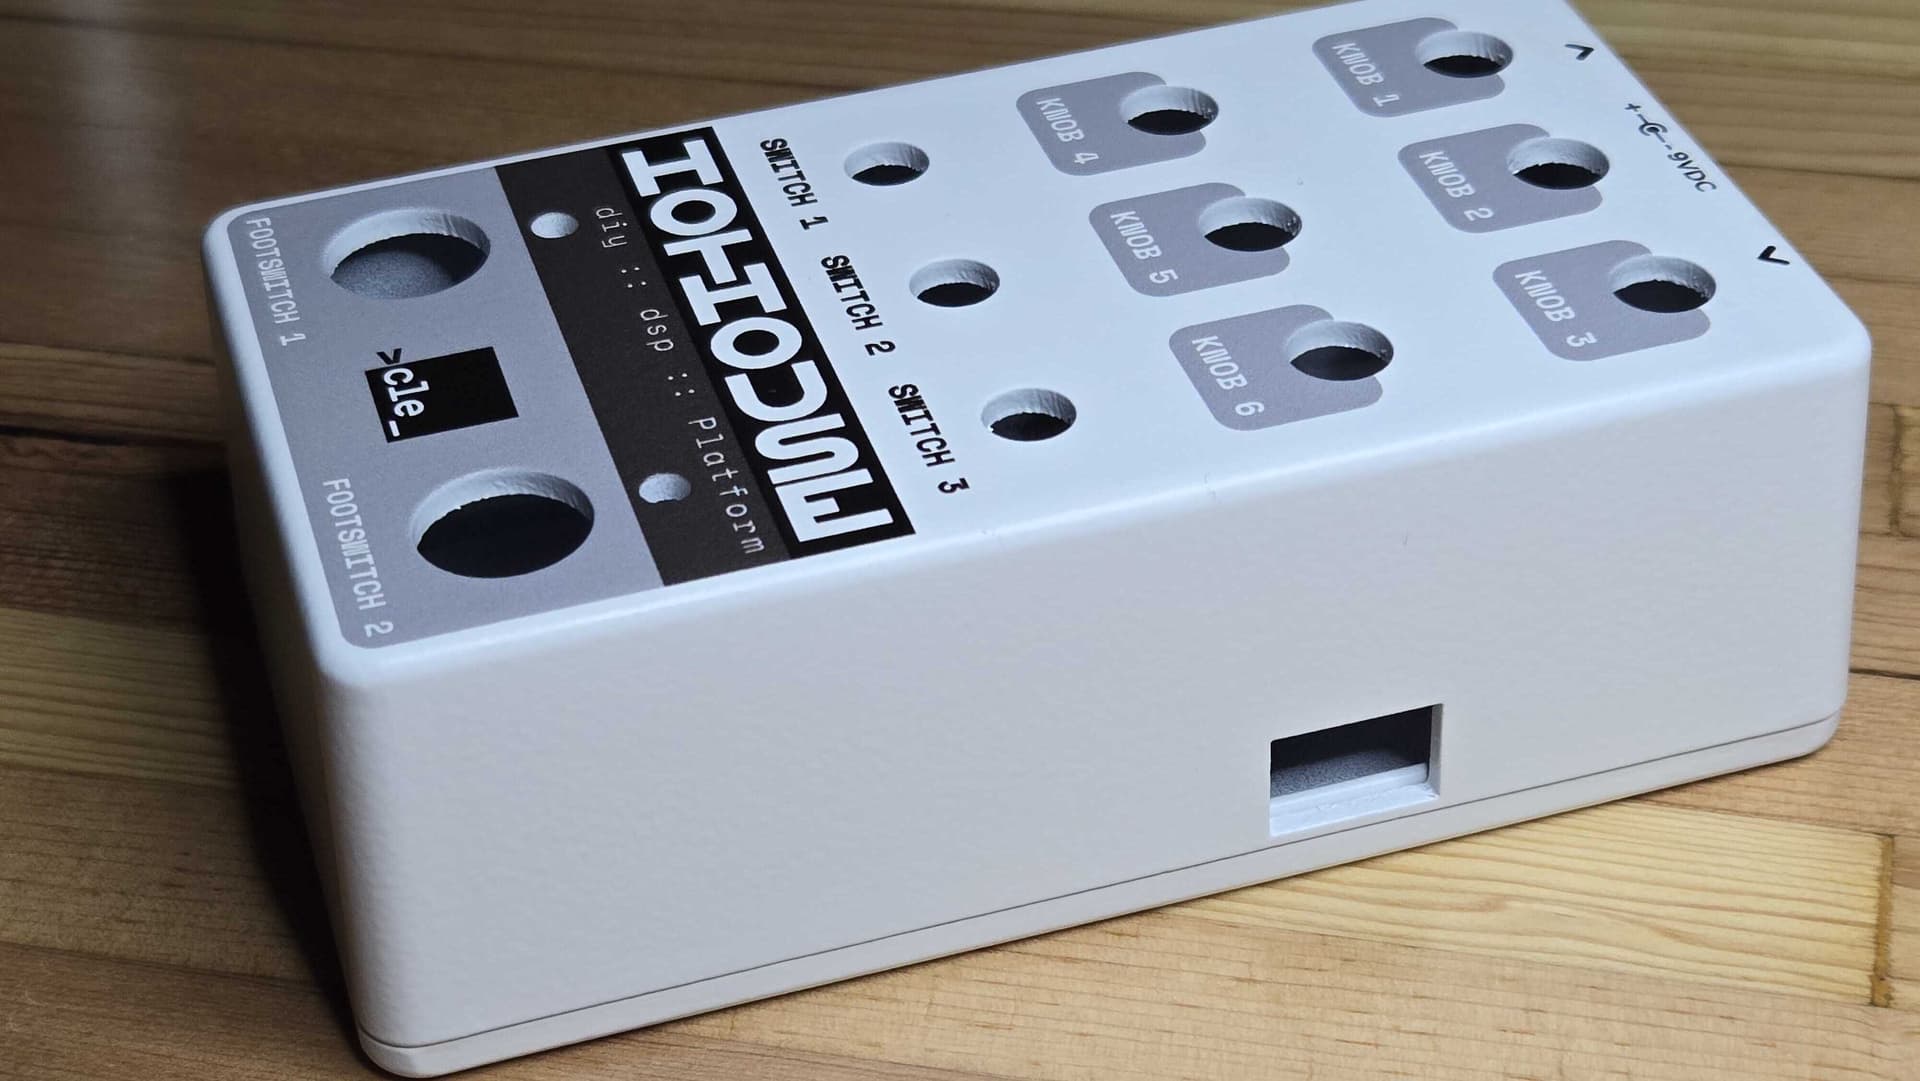
I just wanted to mention the availability of the Hothouse Digital Signal Processing Pedal Kit. It’s essentially an accelerator for taking your Daisy Seed projects from the breadboard to your effects pedalboard without the need to design and source parts for your own PCBs and enclosure. There are no through-hole resistors, capacitors, diodes, etc. to mess with; it’s a matter of assembling the pre-populated PCBs and hardware bits with solder and ribbon cables. Everything except the Daisy Seed is provided, and there’s a growing companion Github repo.
The key features can be found at the Cleveland Music Co. link above. Also note that the Electrosmith folks were kind enough to link to the Hothouse from the Daisy Seed product page (thank you, Andrew!)
Cheers for reading this far!
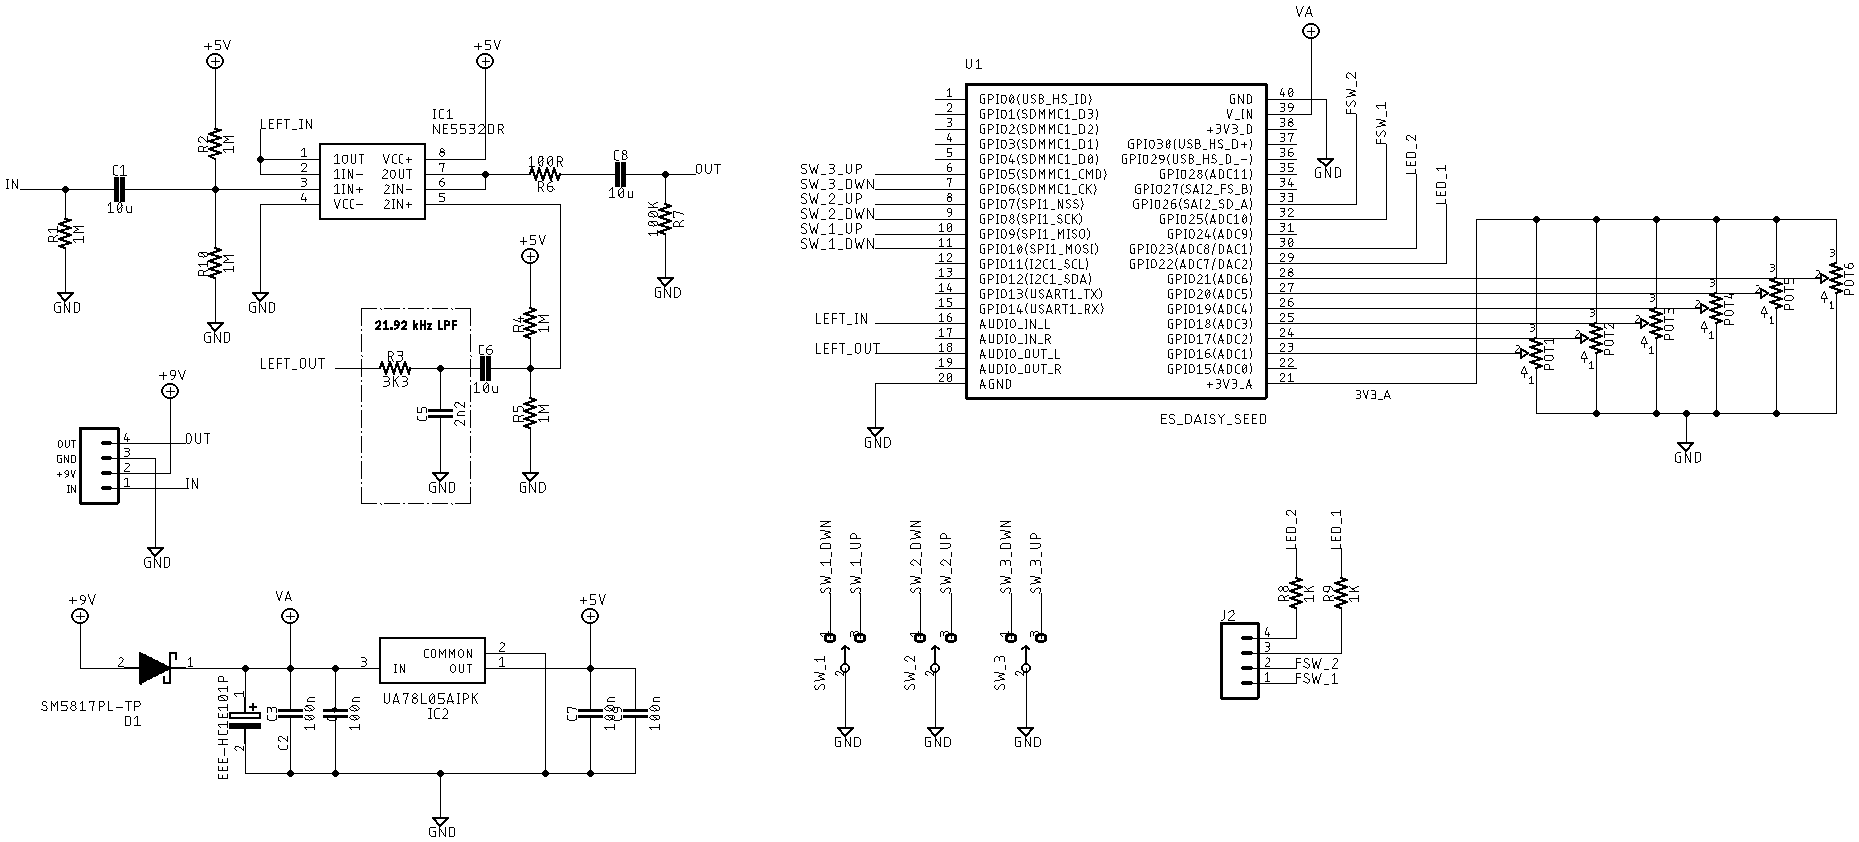
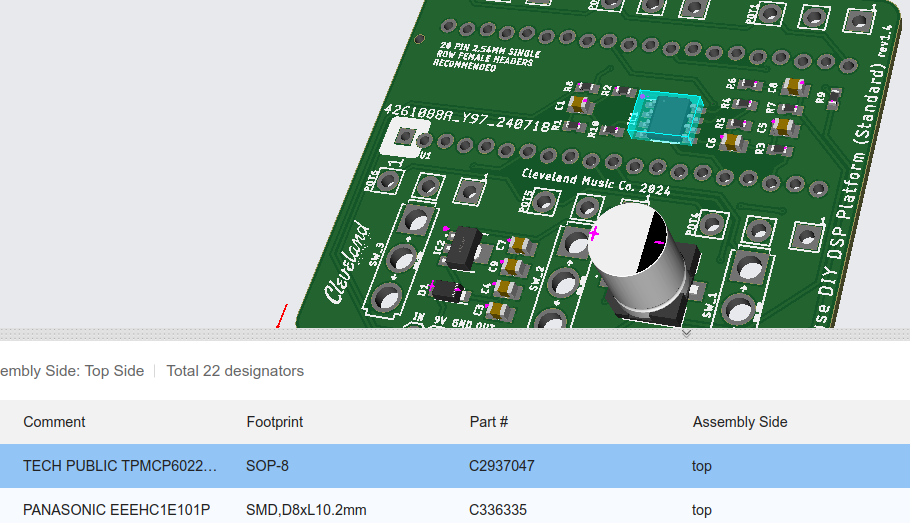
P.S. Worry not audiophiles: yes, it’s a surface mount design, but all the audio path capacitors are C0G/NP0 with Class 1 dielectric material.
I love the idea of this kit - providing the hardware to users to remove the challenge of mechanical construction that many electronic hobbyists (and professionals) find challenging. It can let us get on with coding without worrying how that gets into the audio chain and at our feet. I do have some observations about the electronic circuit design:
How does the NE5532 handle a small, single rail supply? Its spec says its minimum supply is +/-5V yet you are using it with 0-5V which seems half the specified minimum. Did you consider the MCP6022 which has pretty good audio spec (good enough for guitar!) and supports rail-to-rail output. It has a maximum supply of 5.5V but seems an ideal candidate for this use case.
The input impedance looks a bit low, with three 1MΩ resistors effectively in parallel which may result in 0.3MΩ. Have you checked how this sounds with a single coil pickup?
The virtual earth isn’t particularly well isolated from the input which could drag it around quite a lot. You could have used smaller resistors for the potential divider and summed it into the non-inverting input with a high value resistor (e.g. 1MΩ).
I think you missed a trick, not presenting both audio channels of the microcontroller, especially the output which could be used to implement stereo / widening effects. It would be cool to have two jacks on each side to facilitate this or at least two on the output - or even a single stereo socket on the output. (I appreciate many users will use a stereo socket on the input to make the 9V battery connection.)
Good luck with the product. It is definitely welcome.
Cheers very much for the feedback, @riban. In testing, the circuit above performs well enough and is based on other tried and true designs. But I am always open to learning and improving, so I’ll certainly consider your thoughtful suggestions.
I agree about the stereo design. In fact, the next version will be stereo.
I’ll be posting a few more straightforward effects in the coming days. Nothing crazy, but some useful examples to show how to access all the hardware while sounding decent at the same time.
I wanted to point out there is a mistake in this schematic: IC1 is noted as an NE5532 op-amp, but that is incorrect. While doing the PCB layout, this component was selected simply for its SOP-8 footprint. But in the fabrication BOM, an MCP6022 is used.
Here’s a little example for Hothouse. @newkular - add it to your examples if you like
trem_verb.cpp:
// TremVerb for Hothouse DIY DSP Platform
// Copyright (C) 2024 Cleveland Music Co. <code@clevelandmusicco.com>
//
// This program is free software: you can redistribute it and/or modify
// it under the terms of the GNU General Public License as published by
// the Free Software Foundation, either version 3 of the License, or
// (at your option) any later version.
//
// This program is distributed in the hope that it will be useful,
// but WITHOUT ANY WARRANTY; without even the implied warranty of
// MERCHANTABILITY or FITNESS FOR A PARTICULAR PURPOSE.  See the
// GNU General Public License for more details.
//
// You should have received a copy of the GNU General Public License
// along with this program.  If not, see <https://www.gnu.org/licenses/>.

// KNOB_1 : trem RATE
// KNOB_2 : trem DEPTH
// KNOB_3 : Reverb Amount
// TOGGLESWITCH_1 : SAW, SIN, SQUARE
// FS_1 : TREM enable
// FS_2 : VERB enable

#include "daisysp.h"
#include "hothouse.h"

using clevelandmusicco::Hothouse;
using daisy::AudioHandle;
using daisy::Led;
using daisy::SaiHandle;
using daisy::Parameter;
using daisysp::Tremolo;
using daisysp::Oscillator;
using daisysp::ReverbSc;

Hothouse hw;

ReverbSc verb;
Tremolo trem;
Parameter p_rate, p_depth, p_vamt;

// Bypass vars
Led led_trem, led_verb;
bool bypass_trem = true;
bool bypass_verb = true;

int get_waveform(void)
{
  switch (hw.GetToggleswitchPosition(Hothouse::TOGGLESWITCH_1)) {
    case Hothouse::TOGGLESWITCH_UP:
		return Oscillator::WAVE_SAW;
      break;
    case Hothouse::TOGGLESWITCH_MIDDLE:
		return Oscillator::WAVE_SIN;
      break;
    case Hothouse::TOGGLESWITCH_DOWN:
    default:
	return Oscillator::WAVE_SQUARE;
      break;
  }
}

void AudioCallback(AudioHandle::InputBuffer in, AudioHandle::OutputBuffer out,
                   size_t size) {
   static float trem_val;
   float vamt;
   hw.ProcessAllControls();

  if (hw.switches[Hothouse::FOOTSWITCH_1].RisingEdge()) {
    bypass_trem = !bypass_trem;
  }
  // reduce number of LED Updates for pulsing trem LED
  {
	static int count = 0;
	// set led 100 times/sec
	if (++count == hw.AudioCallbackRate() / 100) {
		count = 0;
		led_trem.Set(bypass_trem ? 0.f : trem_val);
	}
  }
  led_trem.Update();
  if (hw.switches[Hothouse::FOOTSWITCH_2].RisingEdge()) {
    bypass_verb = !bypass_verb;
	led_verb.Set(bypass_verb ? 0.f : 1.f);
  }
  led_verb.Update();

  trem.SetFreq(p_rate.Process());
  trem.SetDepth(p_depth.Process());
  trem.SetWaveform(get_waveform());

  for (size_t i = 0; i < size; ++i) {
	float s, out_l, out_r;
	s = in[0][i];
	if (!bypass_trem) {
		// trem_val gets used above for pulsing LED
		trem_val = trem.Process(1.f);
		s = s * trem_val;
	}
	if (!bypass_verb) {
		verb.Process(s, s, &out_l, & out_r);
		vamt = p_vamt.Process();
		s = (s * (1.f - vamt) + vamt * ((out_l+out_r)/2.f));
	}

    out[0][i] = s ;
  }
}

int main() {
  hw.Init();
  hw.SetAudioBlockSize(4);  // Number of samples handled per callback
  hw.SetAudioSampleRate(SaiHandle::Config::SampleRate::SAI_48KHZ);

  // Initialize LEDs
  led_trem.Init(hw.seed.GetPin(Hothouse::LED_1), false);
  led_verb.Init(hw.seed.GetPin(Hothouse::LED_2), false);

  p_rate.Init(hw.knobs[Hothouse::KNOB_1], 0.2f, 20.0f, Parameter::LINEAR);
  p_depth.Init(hw.knobs[Hothouse::KNOB_2], 0.0f, 1.0f, Parameter::LINEAR);
  p_vamt.Init (hw.knobs[Hothouse::KNOB_3], 0.0f, 1.0f, Parameter::LINEAR);

  trem.Init(hw.AudioSampleRate());
  trem.SetWaveform(Oscillator::WAVE_SIN);

  verb.Init(hw.AudioSampleRate());
  verb.SetFeedback(0.87);
  verb.SetLpFreq(10000.0f);

  hw.StartAdc();
  hw.StartAudio(AudioCallback);

  while(1) {
	;
  }

  return 0;
}
We sorted things out in a DM thread, but I wanted to follow up here for anyone else.
I was away from a dev machine yesterday and couldn’t confirm or dispel the observation, so this morning I threw together some quick and dirty test code:
#include "daisysp.h"
#include "hothouse.h"

using clevelandmusicco::Hothouse;
using daisy::AudioHandle;
using daisy::Led;
using daisy::SaiHandle;

Hothouse hw;

Led led_one, led_bypass;
bool bypass = true;

void AudioCallback(AudioHandle::InputBuffer in, AudioHandle::OutputBuffer out, size_t size) {
  hw.ProcessAllControls();

  // Light LED_1 *while* FOOTSWITCH_1 is pressed
  if (hw.switches[Hothouse::FOOTSWITCH_1].Pressed()) {
    led_one.Set(1.0f);
  } else {
    led_one.Set(0.0f);
  }

  // Toggle effect bypass LED when switch is pressed
  // FallingEdge() also works as expected (LED lights when switch is released)
  if (hw.switches[Hothouse::FOOTSWITCH_2].RisingEdge()) {
    bypass = !bypass;
    // LED off when bypassed, on otherwise
    led_bypass.Set(bypass ? 0.0f : 1.0f);
  }

  // Update the LEDs
  led_one.Update();
  led_bypass.Update();

  for (size_t i = 0; i < size; ++i) {
    if (bypass) {
      out[0][i] = in[0][i];
    } else {
      out[0][i] = 0.0f;  // TODO: replace silence with something awesome
    }
  }
}

int main() {
  hw.Init();
  hw.SetAudioBlockSize(4);  // Number of samples handled per callback
  hw.SetAudioSampleRate(SaiHandle::Config::SampleRate::SAI_48KHZ);

  // Initialize LEDs
  led_one.Init(hw.seed.GetPin(Hothouse::LED_1), false);
  led_bypass.Init(hw.seed.GetPin(Hothouse::LED_2), false);

  hw.StartAdc();
  hw.StartAudio(AudioCallback);

  while (true) {
    // Do nothing forever
  }
  return 0;
}
In a nutshell: everything works as I believe it should. And for completeness, here’s where Init() on daisy::Switch gets called in hothouse.cpp:
void Hothouse::InitSwitches() {
  constexpr Pin pin_numbers[SWITCH_LAST] = {
      PIN_SW_1_UP, PIN_SW_1_DOWN, PIN_SW_2_UP, PIN_SW_2_DOWN,
      PIN_SW_3_UP, PIN_SW_3_DOWN, PIN_FSW_1,   PIN_FSW_2,
  };

  for (size_t i = 0; i < SWITCH_LAST; i++) {
    switches[i].Init(pin_numbers[i]);
  }
}
I’ll probably include some little code snippets (or gists) in the doc with clear examples of how to access and use the various hardware controls.
And you’re right: I need to post a correct and complete schematic (including the daughterboard for the LEDs and footswitches) in the doc today. Cheers for that feedback.
No, not as of yet. I’m not very familiar with the Arduino IDE, so it might be a while before I can give it attention. Someone else might get around to it first, and I’d love any collaboration on the docs.
The easiest way to get access to the Hothouse pots and switches and LEDs was to add support to Daisy’s Arduino library (“DaisyDuino”), not the Hothouse library. So, I made a pull request to their library.
Via this method, I don’t get the Hothouse examples, but that’s OK for me. I get access to the pots and switches and LEDs, which is what I cared about most.